skip to main |
skip to sidebar
Hello everyone! I can't believe it has been over
two weeks since I posted something on my blog.
It seems that this is the time of the year when
life takes over a little and I can't blog as much
as I wish. I have been working on lots of sewing
projects these days but I can show none of them yet,
so in the meantime I want to share with you some
of the fun fabric I have gotten in the past month.
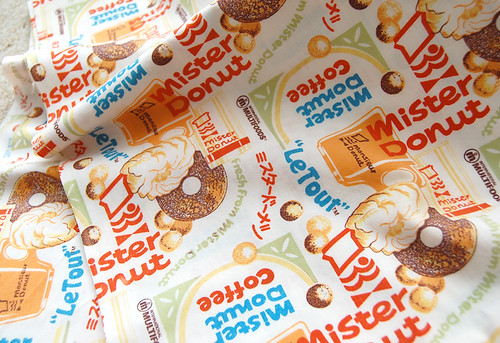
This is the vintage fabric that I found on ebay the other day
that I KNEW I would have to get! Mister Donut is
a donut franchise that you can find anywhere in Japan.
I have never seen a single Mister Donut shop here in
America, so it was surprising to find this being offered
by someone in Illinois. I googled and found that Mister
Donut was actually originally founded in th 50's in
America but was acquired by its competitor, Dunkin Donuts
20 years ago, so almost all the shops of Mister Donut
have changed their names to 'Dunkin Donuts'. How interesting!!
This fabric must have been produced to make something like
curtains or table clothes for the shops, but since it
lost its purposes, it was kept somewhere unused for decades.
Then it eventually decided to travel to join my vintage stash.
Welcome, Mister Donut fabric!! I love you so much!
Just looking at this fabric, I hear "♪Mister Donut♪"
in the head that I have heard over and over on
TV commercials, growing up in Japan.
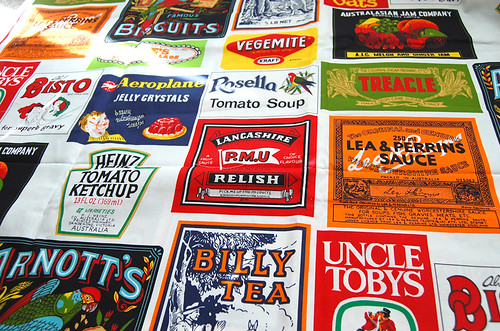
This is another interesting ebay find.
You know how much I love fabric with writing
and kitchen- food- themed fabric, so I was
really excited to discover this guy. The salvage
says "An original Home Yardage Design 'Australia
Fair'" so I am assuming that it was produced
for a fair in Australia where each of these products
were promoted. I am not sure how old this is. Do you
Australians have any guesses? I was a bit surprised
when I opened the package though, because this print
was about 10 times larger than I expected. I thought
I can cut out each label to make a small pincushion
but it is actually large enough to be a quilt block, haha.
I think I'll cut out those vintage looking words
and do some patchwork.
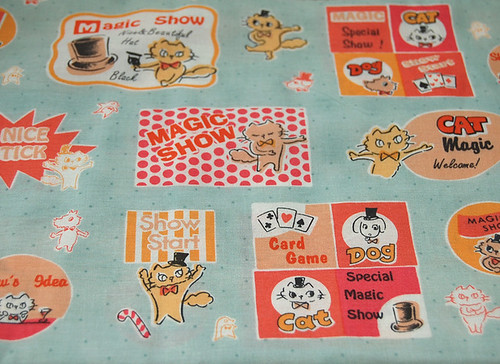
This is one of the fabrics I got from Japan last week.
It is from Cat and Dog Show collection by Lecien.
I hadn't seen this fabric before, so I am pretty sure
it is out of print already and is pretty rare now.
I bought more than I needed, so I listed a fat quarter
of it in my etsy shop in case you want it ;)
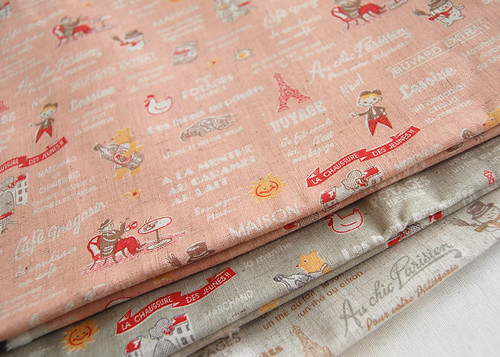
This is also must-be-out-of-print fabric from Lecien.
I found the pink one when I was in Japan two years
ago and I happen to have found it in different colors,
so I snatched them all! I love them. I also listed
a set of these three linen/cotton fabric in my shop.(Sorry, it's sold out)
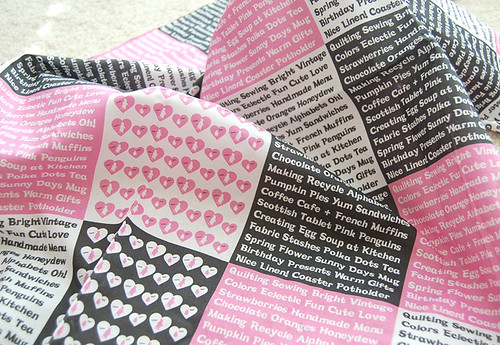
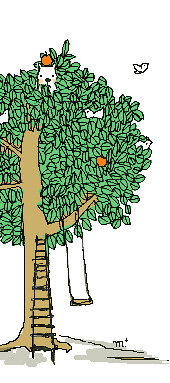
I have posted this in my flickr a while ago, so it
may not be your first time to see this, but I realized
I had never had a chance to talk about it here.
This is my first attempt to design fabric via Spoonflower.
I was very inspired by this picture posted by
Amy of Amy a la mode and thought how cool it would be
if there were fabric with the design like that.
So I took the courage to design fabric like that!
To tell the truth, I am very embarassed to share
this fabric with you when there are so many
awesome colorful fabrics with strong attention to
details in Spoonflower. I know that this is not
the prettiest fabric I have, but it is special
to me because I designed it :D
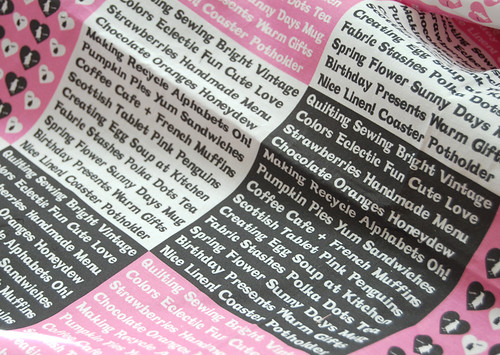
I took the liberty of throwing out random words
that just came to my mind when I was designing it.
You can tell how intelligent I am from those words
I picked, huh. It was funny when one of my friends
saw this fabric and told me "Wow this is good, Ayumi!
Although it was designed by a Japanese person,
there are no mistakes! Awesome!" I cracked up!
Oh what made me decide to talk about this fabric here
was that today I found there was one person who
purchased this fabric from Spoonflower!!!!! Oh my
I was sooooo pleased!! And I thought that there could
possibly be somebody else out there who would like the
fabric also..? And if you happen to be the one, (Really? Thank you!)
it is available here at Spoonflower's website.
I'd be super thrilled if you made anything with it for both personal and commercial purposes :D
Hope you all have a great day :)
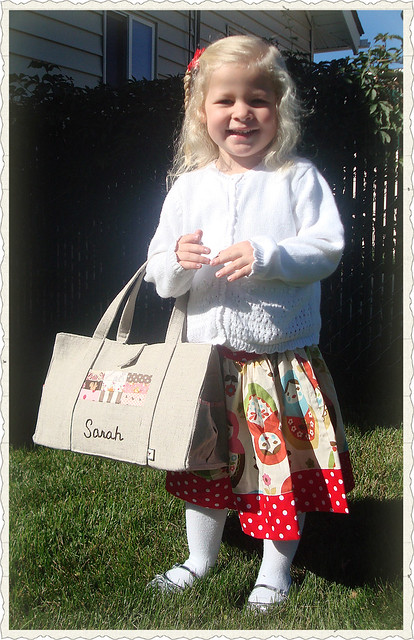
Sarah with the linen bag and the skirt.
How could I not smile..?!
(Thanks Kristina for shooting this picture for me!)
Hope you all have a great day :)
Thank you for many lovely comments for my
previous post ;) It makes a big difference
for me to know that someone like you come
to visit my blog. Thank you! Thank you!
I have a couple of patchwork projects
I want to share with you today.
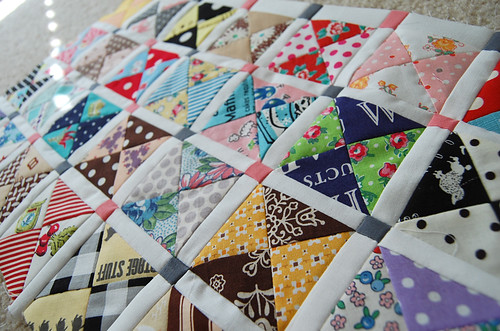
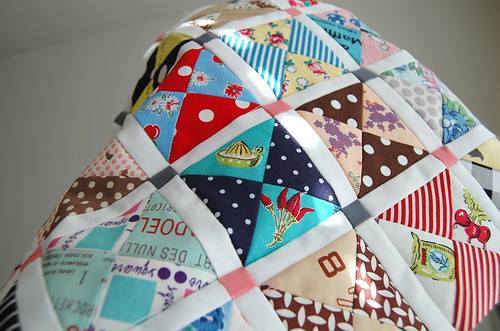
Some of you may recall that I was working on
the quilt. This is how it looks like so far.
Remember I told you that I had 90 blocks for it?
I reduced them to 49 blocks, just because it
looked unbearably busy when laid 90 blocks
out on the floor. I think it is still too busy
but who knows.. A miracle might happen when I
have a wide sashing around those 49 blocks, right?
I'm keeping my fingers crossed...!
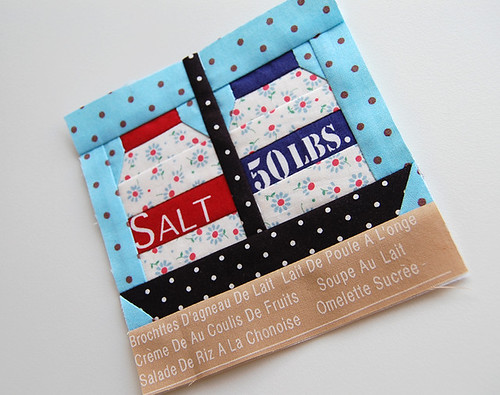
This is a little patchwork project I worked on.
I used a pattern in Kumiko Fujita's Patchwork
Pattern 318. It's supposed to be a cute
little basket with a set of jam, but since
I picked the word salt and 50lb. It looks more
like a yacht with big salt bins that just
arrived at the dock or something. lol.
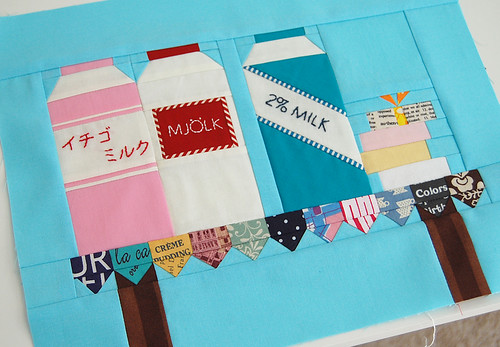
Here is a block I made for Kerry as a part
of Ringo Pie patchwork bee. The theme for her
was "collecting/hoarding" I decided on milk cartons
to reflect on my hoarding problem with them. Before
I got into this sewing world, I was crazy
about making soap, which I might have mentioned
too many times here by now. lol, Anyways,
this is to showcase my milk cartons with
some soap on the right side. (The top one
is wrapped up and ready to go!)
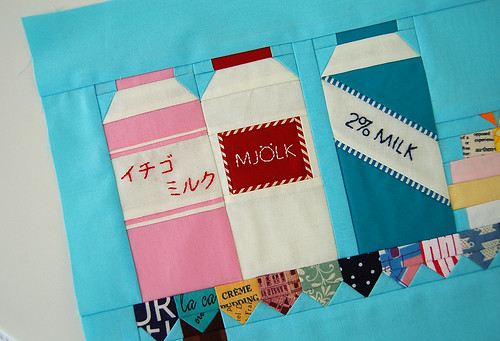
No I don't have milk cartons in different
languages, but it would be really cool if I did!
The one on the left side is supposed to be
Japanese strawberry milk. The middle one is
a Swedish word for milk. (Once again, I am
pretending to know European language!)
And the one on the right is clearly, 2% milk.
Why 2%? I was really surprised when I first
saw 2% or fat free milk in America for the
first time. It didn't make sense to me, since
you can't find milk that is that low in fat
in Japan. So to me, adding '2%' to the milk
carton increases American-ness, therefore,
the diversity in this block. I am not sure
if Swedish milk is sold in cartons, but
let's say it probably is for this purpose. lol.
Thank you for stopping by again ;)
I hope you have a lovely day!
Hello everyone! It's been a long time, hasn't it?
I'm sorry I had been away for such a long time.
I never meant to be gone for this long
but life has taken over a little. I feel like
there are too many things I want to share today.
I could talk about how nice it was to have my friends
over from Japan and to visit lots of places
with them like Napa Valley. I could talk about
how much fun it has been to be a part of the
Ringo Pie flickr group that Penny of Sewtakeahike
and I started with super creative folks. I could
also talk about fabulous surprise packages I have
received in the past few weeks. And I could talk about
how my sewing projects have been progressing, but you
know what,I think I need to make this post short
because I have to finish up this post before
this little boy who's taking a nap wakes up.
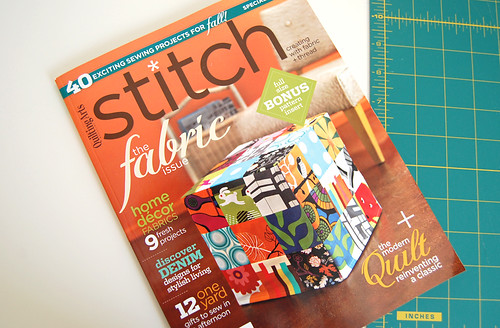
Ok, so let me focus on one topic today.
How about me talking about the new Stitch
magazine that came out very recently?!
I am super duper lucky to have my projects
published in the magazine again!!!

These are made for the theme of the magazine
called "One yard gifts to sew in one afternoon."
Yay, so they can be made if you have just one
yard of kona fabric (that is usually available
at local craft shops like Joann) and some
small fabric scraps and interfacing in your hand.
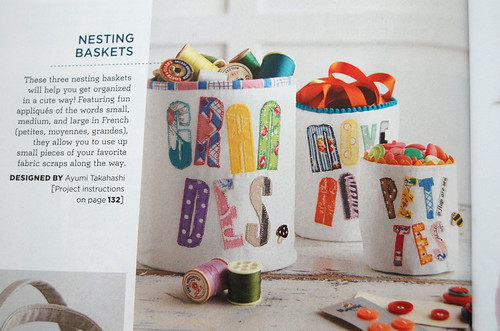
I think this project gave me a great chance
to use up my fabric scraps that I truly love.
I would like to thank erica of Crafty Blossom
who had given me the fabric I used for "G"
for Grandes (meaning 'big' in French) and
Mary who had kindly shared with me the feedsack
I used for "S" for Petites (small in French).
Moyoness is medium in French if my online search
for these words was successful. I thought about
using Japanese words for them but they aren't nearly
as pretty (大 中 小) -----> ouch!
so I pretended I knew some French.
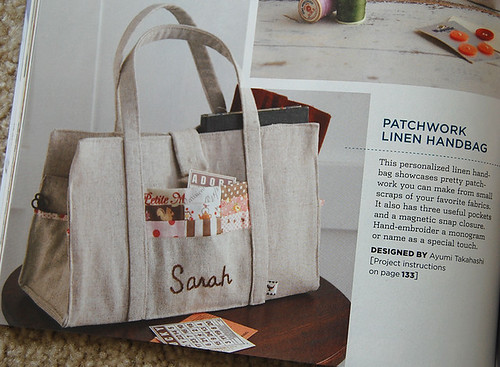
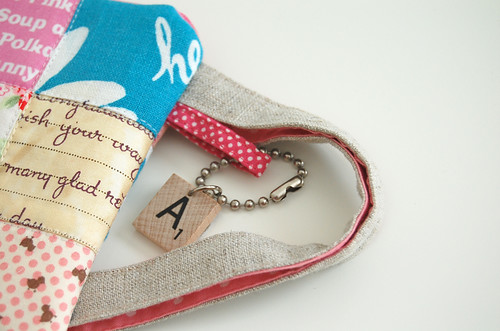
This is a linen bag that was also for the
one yard theme. And once again I want to
thank erica because her fabric appears
at the binding of the side pockets ;)
Erica, I am just in love with your fabrics
in case it's not obvious, lol.
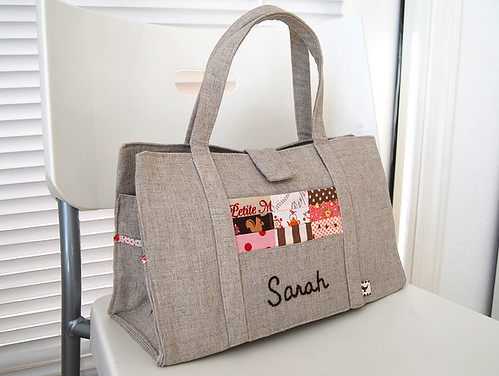
I picked Joe's niece's name Sarah to embroider
on the pocket because I think her name is so adorable
and I knew that this bag would look very
good if a pretty girl like her carries it.
I am sending this to Sarah tomorrow. Kristina,
remember to send me a picture of her with this bag!
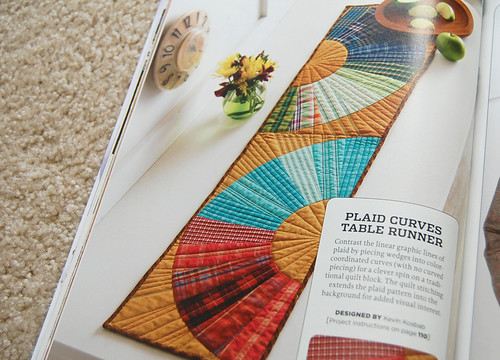
I must say that Stitch keeps blowing my mind
with just really unique projects and interesting articles.
There are so many great projects that made me itch,
but if I were to pick my favorite, I'd have to
select this plaid curves table runner by Kevin
Kosbab of Feed Dog Designs
who also made the fun slip cover on this
Stitch issue! How talented is he?
Oh and I had been wanting to share this with
you! I had a great pleasure being interviewed
by Stefanie Berganini, one of awesome Stitch
editors. If you are a little curious about
my sewing life and have some time to spare,
would you be so kind to take a little look
at my interview which you can find here in
Stitch's new blog?
Thank you for taking the time to read
this post ;) I'll be back soon :D
Have a great rest of summer
(or winter for some of you ;) )
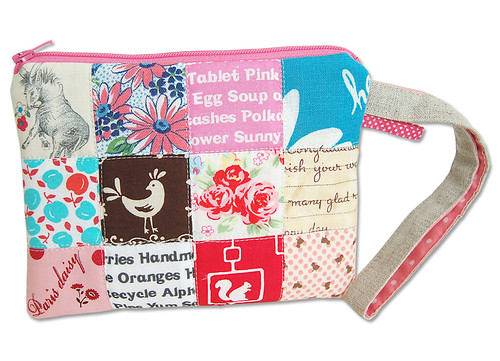
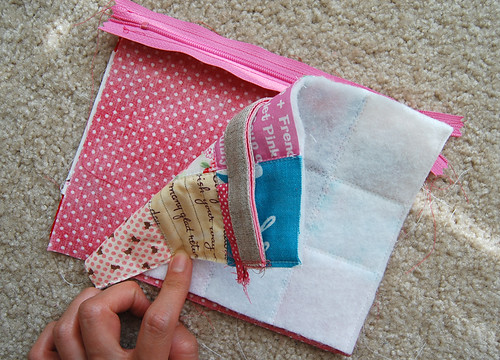
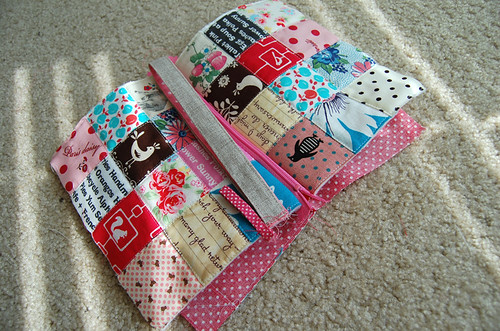
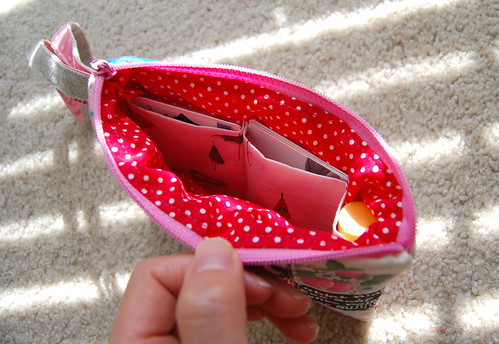
Thank you to many of you who requested
a tutorial on this pouch. This wristlet,
measuring approximately 6 3/4" x 5",
has some fun features including three inside
pockets for cards and a chap stick and a little
loop outside the pouch that holds a key chain.
I have been making tons of these pouches just
because this project is simple, easy, quick, fun,
and quite addictive, so I hope you enjoy this tutorial.
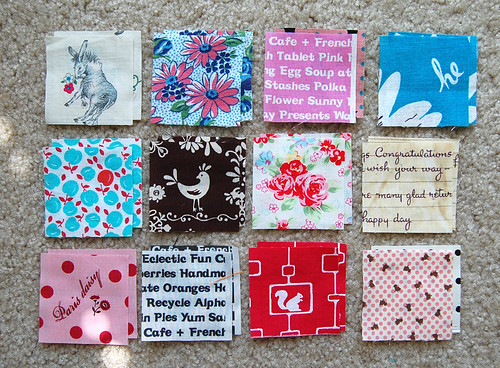
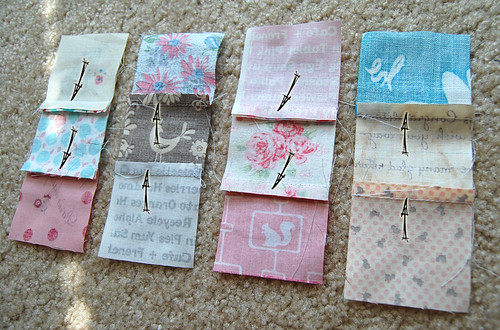
We start off with twenty four 2 1/4" squares.
(Once again, seam allowance of 1/4" is
included unless otherwise noted.)
Twelve of them will be one side, and
the other twelve go to the back side.
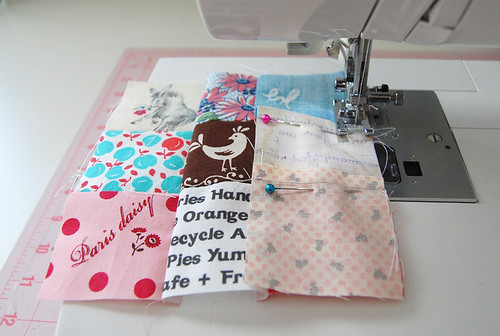
We now take the twelve squares that come to
one side of the pouch. Then we'll make
patchwork strips of columns.
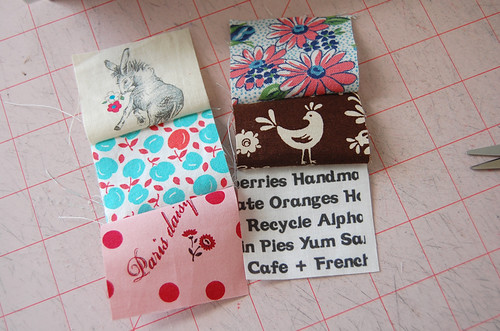
Fun ;)
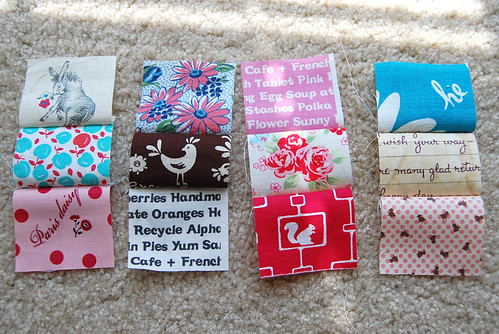
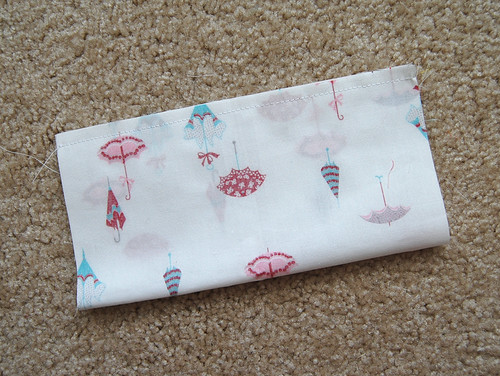
After you have four strips, it's time to press.
Pressing seam allowances like this will make
your finished patchwork piece less bulky and
it helps to ensure that each corner of a square
piece matches with corners of other squares around it.
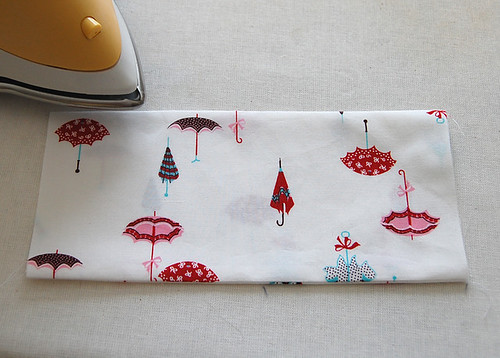
We'll sew them together.

Then press seams open! Yay just like you
did for the fabric basket and the patchwork
drawstring bag! I sure love square patches :D
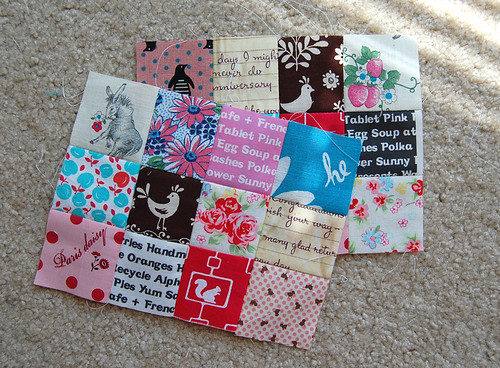
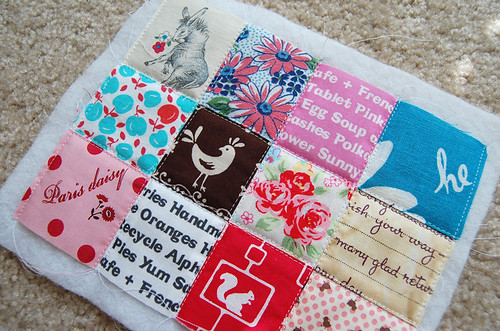
After repeating the same process with the rest of
twelve squares, we have two patchwork panels.
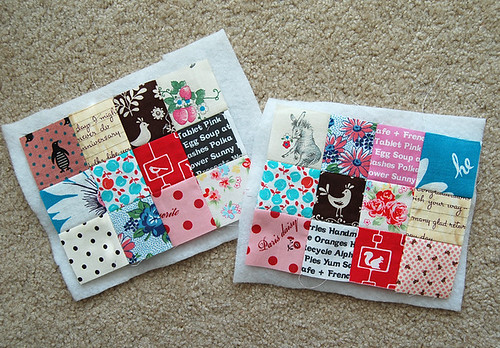
Then we'll fuse each of them onto a piece
of medium to heavy weight batting. I like
to use quilting spray for this process
rather than using fusible batting.
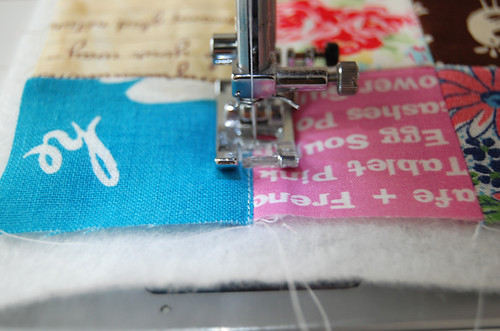
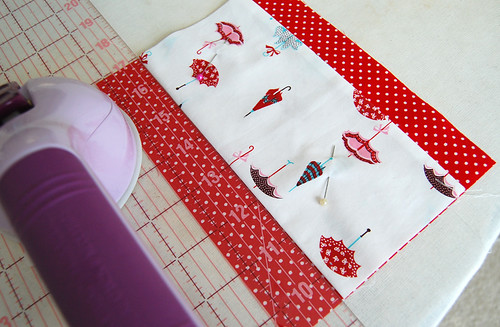
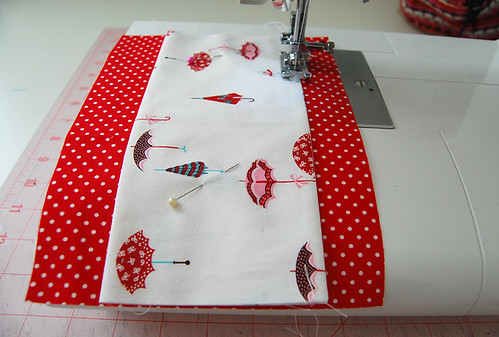
The quilting style here is totally up to you.
Zig-Zag stitching is fun and quick, but
what I've been doing is this; quilting
very close to both sides of each seam,
and the short edges..
like that.
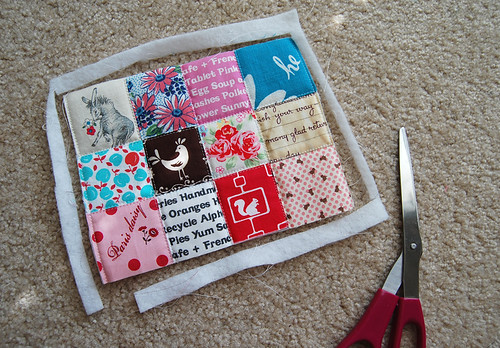
Then we cut off the excess.
Fun part ;)

Now let's move onto making a handle.
We need two strips; one linen piece
and one cotton piece. If you'd rather
use cotton for both two strips, I
recommend that you use interfacing.
(Just like how the handles for the
lunch bag are made.)
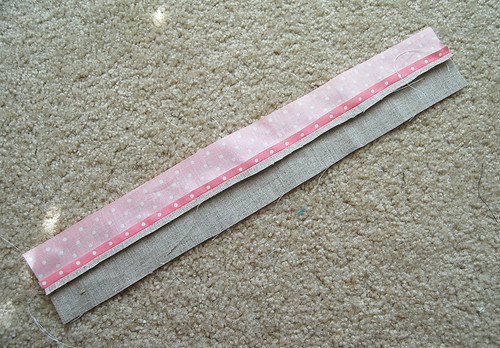
Once again, this is just like making
handles for the lunch bag and
the fabric basket.
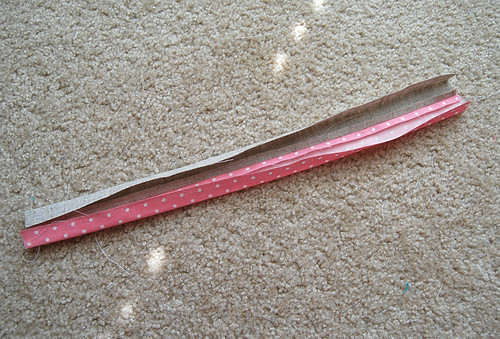
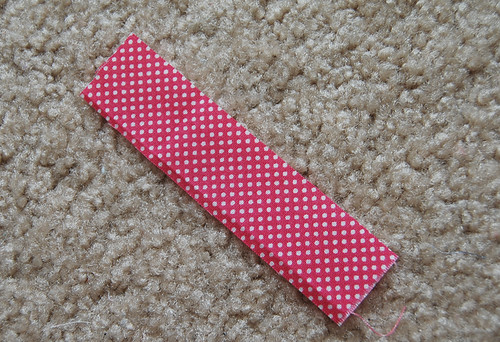
Folding each long edge toward the middle..
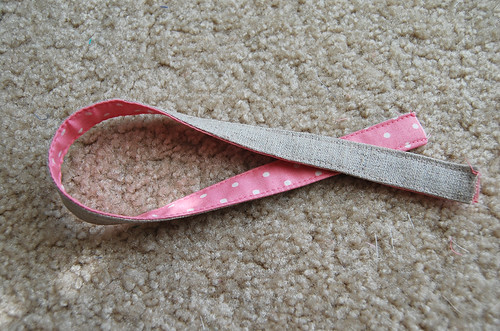
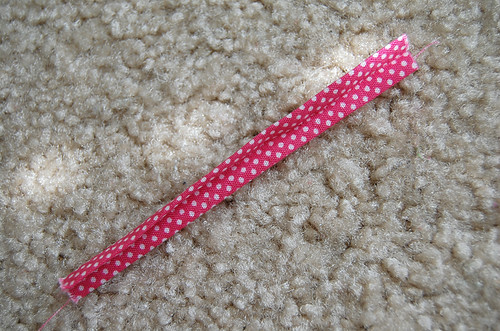
Then top-stitching both long edges.
If you want to attach a loop for your
pouch, cut out one rectangle piece
measuring 1" x 4".
Just like the handle, we fold and
press this piece like this and..
top-stitch both long edges.
We will now machine-baste the handle
and the loop you made onto one of
the patchwork panel close to the
top right corner like this.
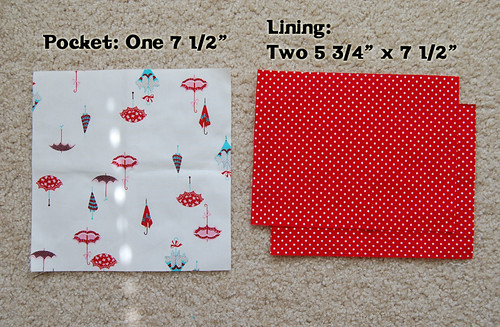
Now let's work on the lining. We need
two pieces for the lining and one piece
for three pockets.
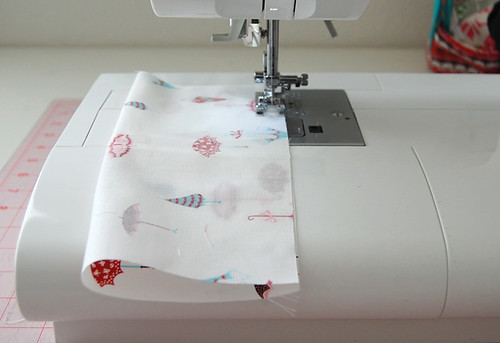
Take the pocket piece, fold it in half
with right side together, and sew the
one long edge together.
So your pocket looks like this.
Not so cute, so let's turn it inside out.
And press. That's much better :D
Now take a ruler and one of the lining pieces
to attach a pocket onto. I like to leave
about 1 1/4" above the pocket.
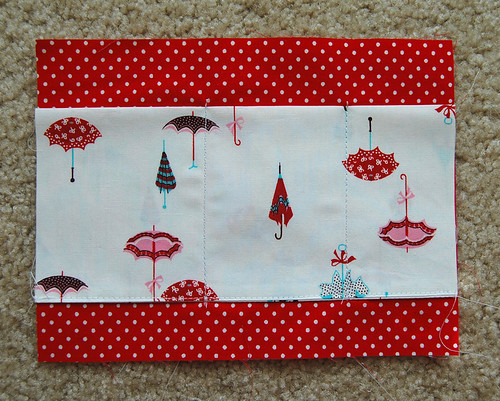
Then sew the bottom edge of the pocket
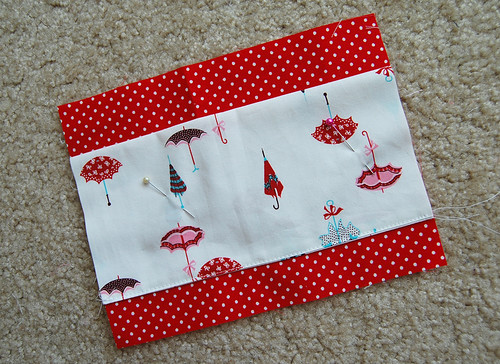
so it looks like this now.
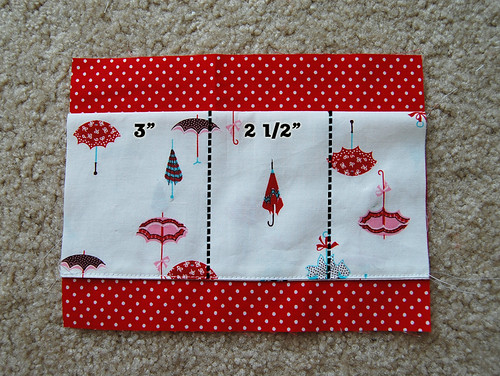
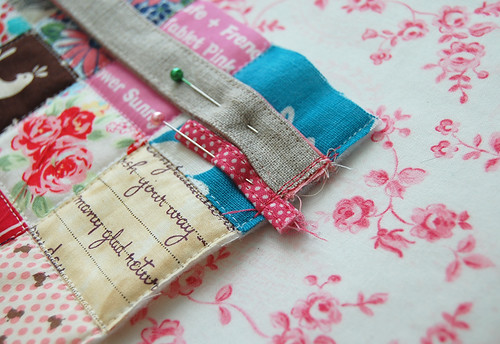
Using a water soluble pen, draw these lines.
The two pockets on the left are going to
be for your cards and one on the right is
for your chap stick, if you like to carry one.
In this image, there is no sewing done at the
short edges of the pockets, but I recommend
you sew very close to those edges just so that
you'll deal with less pins later.
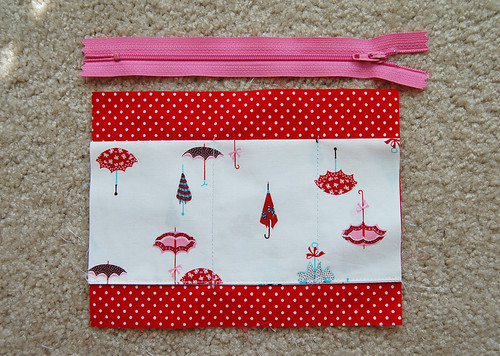
Let's now attach a 7" zipper. I know that
dealing with a zipper is a bit intimidating
for a beginner, (I used to be terrified at this
too) but it is actually not that hard. Trust me.
After attaching a zipper in several different
ways, I found this way the easiest, so if you
are a beginner, I hope you'll follow this
step-by-step instruction ;)
Oh and I have to tell you that Zipit is a great place to
get zippers! The owner Jennie is extremely
nice and generous and her zippers are just
the best! Fastest shipping too :D
I don't think I'd ever buy zippers from
anywhere else. yeah, that's how much
I'm in love with the shop, hehe.
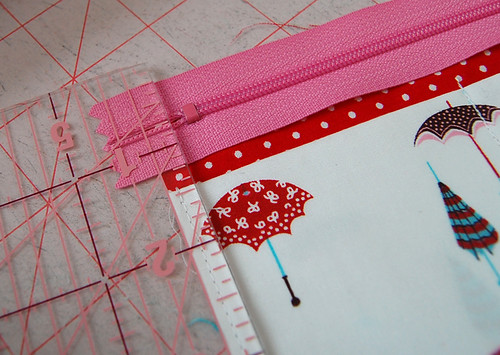
So here, I make sure that there is more than
1/4" from the left edge of the lining piece to
the metal part of the zipper. This way, we can
avoid sewing onto the metal, which will break
your needle instantaneously. (Don't ask me how
many needles I have broken this way, lol)
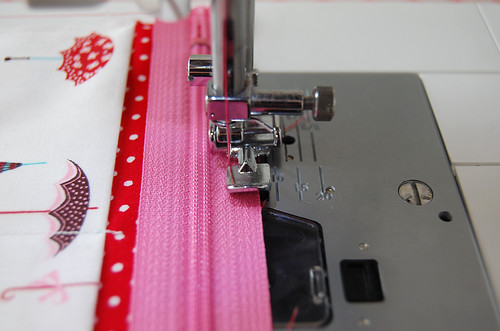
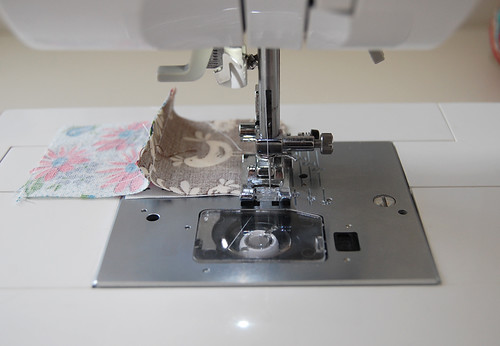
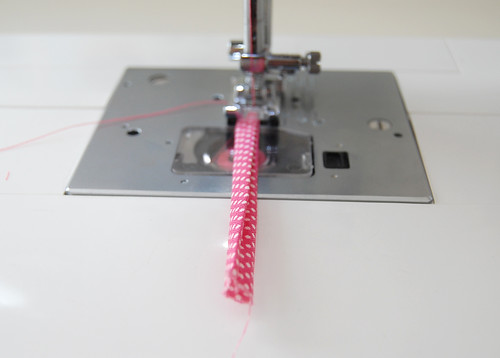
Remember to use a zipper foot that probably came
with your sewing machine that should look like
this one in the image above. With a zipper foot,
start sewing from the end of the zipper.
Here, your zipper is completely closed.
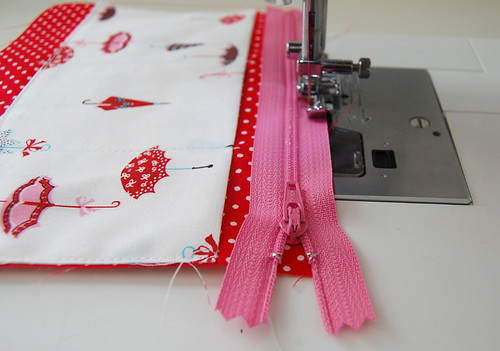
Stop, once you sewed it half-way and lift
up your zipper foot.
And bring the zipper-head to the very end,
lift down the foot again, and keep sewing.
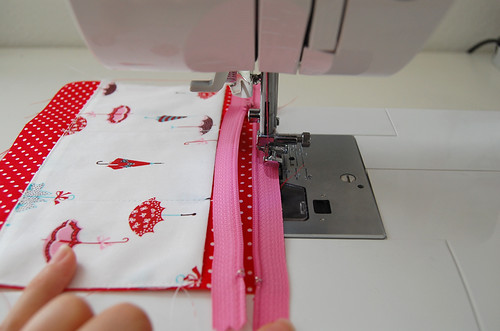
I've found that it is very important to always
have the zipper-head very far from where I am
sewing. It is quite difficult to keep stitching
straight if a zipper-head is near the foot.
I do this moving-zipper-head for every single
piece I attach to a zipper.

With the zipper completely closed,
we'll attach another lining piece onto the
zipper. This time, we can't really see a zipper,
but as long as you can make sure that the piece
is aligning with the zipper, it's totally fine.
Oh and don't forget to move the zipper-head
when you sewed it half-way just like you did
for the other lining. (I hope I am not annoying
you by repeating this, lol, it's just so
helpful to do it that I can't stress enough.)

When both lining pieces are attached to the
zipper, it looks like this. Nice :)
Take a patchwork piece that has a handle
and a loop attached. We are sewing
this onto the zipper now.
Like that.
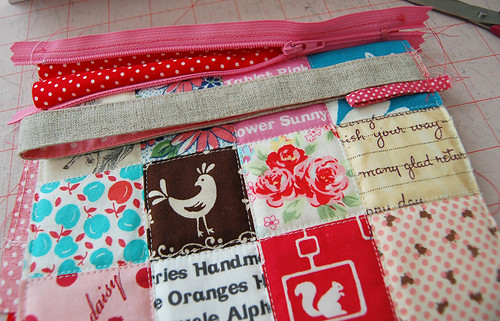
This is how it should look like.
Now we will attach the other patchwork piece.
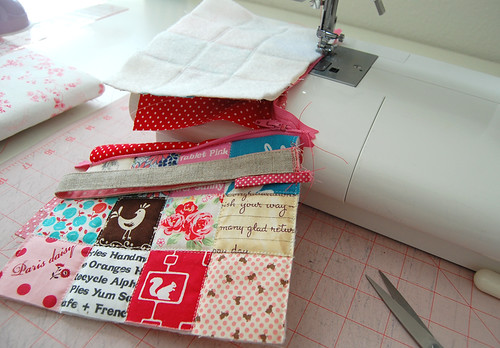
This time, it's a little different, because
we start off with the zipper completely open.
Then when we come to half-way, we close up
the zipper to keep sewing.
After all the pieces are attached,
it should look like this.
This is optional, but you might want to sew
the top of the lining just to make sure it
won't be too puffy and in your way when you
open the pouch. Here we want to make sure that
in this process, we don't have our patchwork
panel underneath the lining piece being sewn.
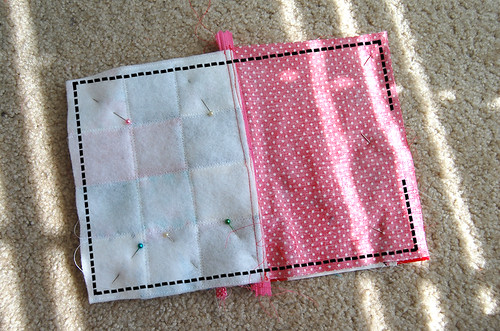
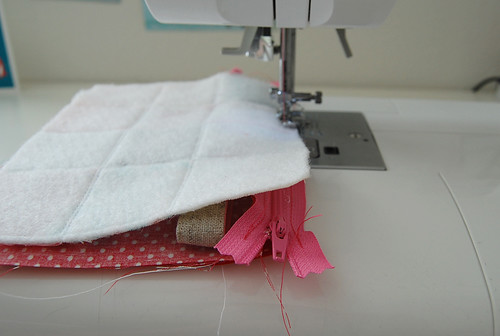
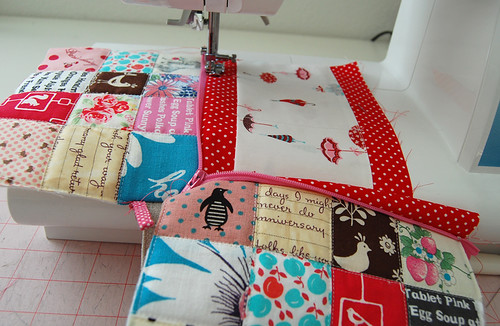
With right sides together, pin both patchwork
panels together and do the same for the lining.Make sure to fold your handle inside and to have your zipper about 80% open.Sew the dotted line, with at least 2.5" opening at the bottom of the lining.
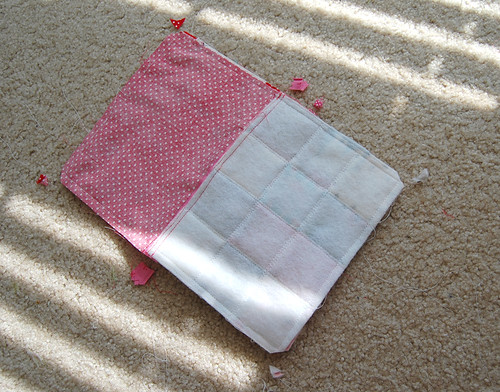
Cut off corners and excess,
and flip it inside out from the opening.
Hand-stitch the opening closed will complete
your wristlet with these three pockets ;)
How about adding a key chain here..?
This is so much fun that I really hope
you'll sew up some of these! I am off to
making a few more because I have my old
friends visiting from Japan this weekend!
Oh how I am excited. I am picturing
them with these pouches at the Farmer's market. Yipee!
I'd love it if you
added your finished pouches in this flickr pool ;)
Have a fabulous day!


