Hi all! Thank you for your sweet comments/e-mails. I always love to hear from you!
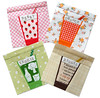
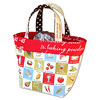
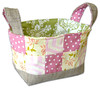
One of the most requests I've had was to make the fabric basket tutorial printable. Many of you have told me how you had difficulties trying to print out the post and asked me to make a PDF for it. And here it is! I finally created a PDF for the fabric basket tutorial.
I'm sorry it took me ages to get this available for you. I finally figured out how to convert a word document into a pdf, (which was extremely simple by the way with this website's help), so I am now more encouraged to make my future tutorials available in PDFs!
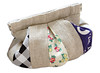
Speaking of tutorials, several of you have given me suggestions to make a tute for the puffy pouch I've made recently. I would LOVE to make the tutorial except that I am not sure if involving a flex frame is a good idea. I've noticed that the more universal my tutorial is, the more people enjoy creating items off of the tutorial, which makes a lot of sense. I would rather make a tute that everyone can enjoy without much trouble finding materials, so I would like to ask you to vote now ;D
I started getting busy making Christmas gifts now that my finals are almost over! Woo hoo! These are my third and fourth fabric balls I've made this week. The first two were given to Taihei, the boy I babysit, for his 2nd birthday. I forgot to take pictures of them but I loved how they turned out so much that I had to have a go at making more and these are now on their ways to my friend's baby girl in Japan.
I stamped her name on the little balls, which I think made the gifts more personal and special ;) The tutorial I used was this one by Tanya of Grand Revival Designs. I love how simple and quick this project is, so I know I'll be making more and more. haha. (When I learn to make something easy and quick, I can't go without making several at least.)
And I made bath bombs using Christmas-themed soap molds. I've made tons and tons of these in the past and I just love how recipients are always fascinated to try it out. These are going to be for my friends I worked on a school project with. I love gift-giving, because to me that is the best way to show how much I appreciate how they are.
Bath Bombs are super easy to make and the tutorials are everywhere online, and soap molds are available in many online shops like this one as well!
Hi everyone! I hope you all had a great Thanksgiving. I went on a little trip to Santa Cruz with Joe, and had lots of fun walking by the beach, listening to sea lions and sea gulls, and being in some place different.
Thank you so much for those of you who helped me find out what those frames are called. I updated the previous post with the links to the online shops you guys had recommended for me, so if you happen to be looking for shops that carry the frames, scroll down a little to get to the previous post! I've already ordered a set of 5 of 5" flex frames from ArtFire. I can't wait to get those now that I love making these pouches!!
This one is for my friend's friend's B-day gift. I think it turned out pretty lovely. I was thinking that it might make an interesting pattern if the opening part does not involve any gathering but the shell part of the pouch has some fun fabric hiding, which kinda pops up when the pouch is opened or is filled with lots of stuff inside. And I am in LOVE with this pattern that I came up with!!
Now I have lots of ideas for those flex frames and I am dying to try out a bunch of things with different fabrics!
On a separate note, I want to thank some folks who were extremely nice to have given me *penguin* gifts! This is a handmade stamp from ako of BeachField. She was so nice to custom-make this cutest stamp for me. You can't see this in this picture, but a piece of hand-curved eraser is attached to this wooden block on the back. Isn't it indescribably adorable?! I've been using this stamp to create my original linen coasters. During the winter break, I might make a whole bunch of PinkPenguin coasters for future gift ideas. By the way, ako is a really popular stamp maker in Japan. Her first book came out pretty recently and I was so happy to see her book in Kinokuniya in San Francisco. Thank you so much again, ako! akoさん、本当にありがと~~♪♪
What's been much loved here is this knitted pink penguin that was in a surprise mail from AJ in Scotland. I can't believe how thoughtful of her to knit such a cute pink penguin for me and how professionally this is made. The hat and the scarf are removable. You have no idea how many times I've taken off the hat and put it back on. This fits so perfectly that it gives me some therapeutic feel to do this. I am really in love with this plush. It sleeps next to me every night. Thank you so much, AJ!!
Here comes another lovely penguin gift, a bundle of penguin fat quarters from Carolyn in Arizona! Penguin print fabric is so hard to find, and finding a bundle of matching penguin print fabric is like almost impossible! Those penguins on fabric are so cute! I think it will make a nice boyish baby quilt, but I can hardly ever think about cutting any of these fabric. Carolyn is just so sweet. The letter from her was so warm and touching. Thank you so much, Carolyn!!
The last one is this very rare penguin rayon fabric from Leslie of 36OldsGal This is like everything I love combined- Penguin + Navy + Pink + Dots/Circles. Leslie has the best fabric selection and I can't believe how generous she was to share her precious fabric with me. Again, I don't want to use it for my crafts yet. Let me adore it for a while before putting it into use.. Thank you so much, Leslie!!
I've been thinking a lot these days about what is important in my life and what is not. I've realized that trying everything at once doesn't work at all. At some points in life, I need to give up on things and focus on what I can do now to specialize in what I really enjoy. And what I know for sure that I truly enjoy, besides friends and families is crafting and blogging. I especially enjoy meeting people like you guys who have the same interests and who can mutually inspire each other.
I'm so grateful I've met such nice people who have spent some time reading my blog, trying out my tutorials, and letting me know that they enjoy coming here. I feel like if I know there were nobody to share my projects online, my desire to get crafty might have been a lot less.. so if you are one of those who've been wondering about starting a craft blog, please go for it! How much the simple first step can influence your life is like... amazing! Trust me!
I am so appreciative of the opportunities this blog has brought for me. Thank you again for all the beautiful and thoughtful penguin gifts!
Thanks for coming and reading!! Have a wonderful week!
Note: The pattern for the knitted penguin is by Jean Greenhowe
I must admit that I have to catch up with my crafting life. There are lots of projects I've been wanting to work on but it has been just so busy that I couldn't really commit to work on a big project. Christmas is just a month away, isn't it? This makes me happy and sad at the same time. I'm happy because I might visit Joe's family for Christmas which will for sure be fun as it has always been. I am sad because it looks like I won't be able to make handmade gifts for as many people as I was hoping.. too little time left for a super slow crafter like myself.. I've seen lots of fabric baskets filled with Christmas gifts this year again. Thank you so much for making those ;) I might have to make some for my folks too since you guys' baskets look so inspiring! Let's see how many baskets I can make...
I'm glad I finally made a pouch using this metal opening. I bought a few of these in my last trip to Japan. This is such an interesting material; the only thing you do to open the pouch is to squeeze the ends. so quick and convenient! I thought some of you may be interested in getting those, so I was looking for some websites that sell these metal opening thingies, but I really couldn't find one, since I have no idea what these metal opening thingies may be called in English. Googling with random attempts didn't help. I'm very sure there are etsy shops that carry these though! Does anyone know what these are called..?
:Updated:
Those are called Flex Frames/Hexagonal Purse Frames! (Thank you so much for those of you who let me know this and share with me some cool online shops!) It seems that those flex frames are available in many different sizes in the states, and here are some of the online shops you can find those. -Artfire (Thanks to Beth & Tessa Van). -Tall Poppy Craft (Thanks to Natalie) -Fabric Tales (Thanks to Cecili) -Ghee's (Thanks to Dot & MaryEllen) -Retrosaria-Portugal (Thanks to Anacrafts) -PeacockPatterns (Thanks to SueAnn)
I really like how it turned out. I love all the fabric I used for this project. Most of the fabric is from Japan, but the plaid print is a feedsack I snatched at ebay. A French theme + a vintage twist + little craziness + Japanese influence = too cute!
By the way, the pouch has been listed in my shop ;) As always, let me know if you come from here to snatch an item in my shop - I'd love to include a little gift!
The linen I used for the right and left sides of the pouch comes from this stash. I got this extremely quality linen from this shop. (Sorry this is only in Japanese, but it looks like they ship internationally.) When I got this stash in my mail, I was so super excited that I couldn't stop touching it, smelling it, and taking photos of it. I even started dreaming about starting my own business by building a linen factory or something. How crazy? I know! I just sometimes wish I could get my hands on good linen like this much easier in the states. haha.
Here is a set of fabric that I kinda want to do something with. Maybe another pouch? ... with linen? Any ideas..?
Oh my gooodness! You guys are just the sweetest people ever!!! It's so super nice to know that I have people like you who are as happy as I am (and Joe is) about the contribution to the Stitch magazine. I still carries the mag with me everywhere I go because looking at it not only does remind me of the happy thing that happened to me but also makes me think of you guys, how warm, supportive, and encouraging you guys have been.. and that just makes my day. So a BIG thank you for all of you!!!!
By the way, I am so bummed that I missed out the Scrap Buster Contest. I thought the deadline is the end of this month, but I just found out that the entry has been closed since the deadline was the 23rd of October. Ouch! You may have had enough cool tutorials that use up scraps by now, but I made a little quick tutorial anyway, so let me share it here today..
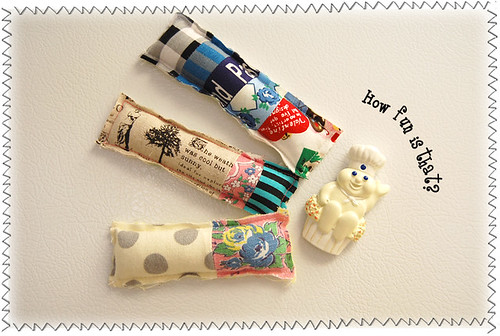
This is really one of the quickest things to make that I can think of that is decorative and practical and can be a little last-minute gift.
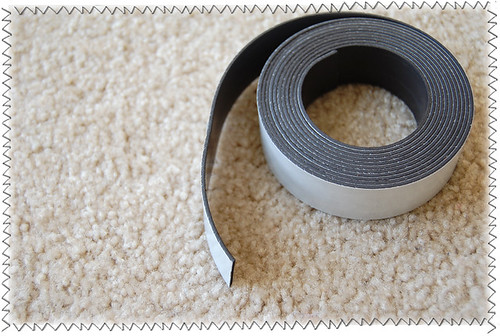
I used this magnetic tape (1" width). It doesn't have to have the adhesive tape; as long as it's a magnet that can be cut into your desired sizes that would be great ;)
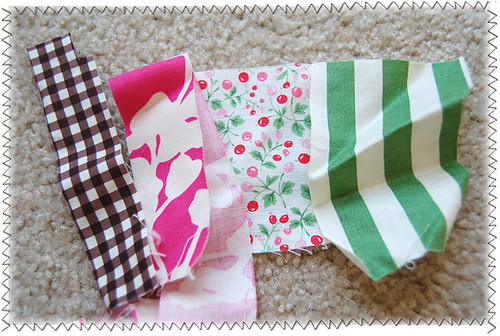
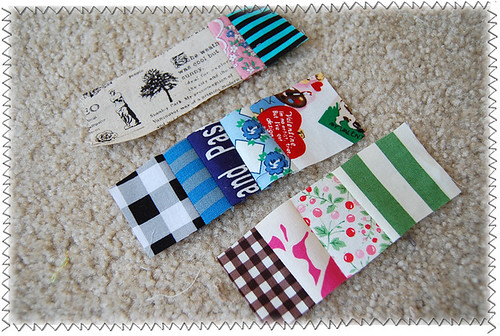
I grabbed some scraps that match well together. Sizes of scraps don't matter as long as the length of each scrap is at least 1" longer than your finished project. Here, each scrap of mine had to be at least 2" in length.
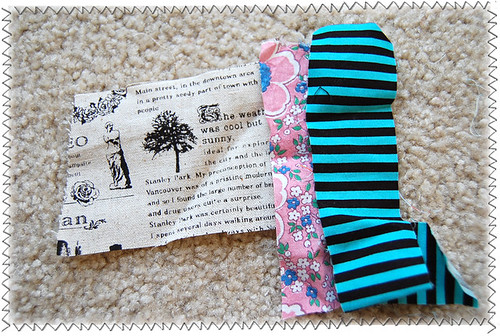
Here is another combination I came up with.
And this one.
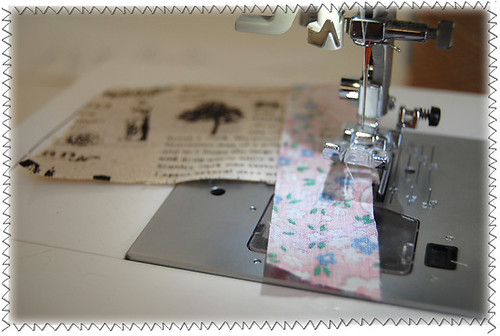
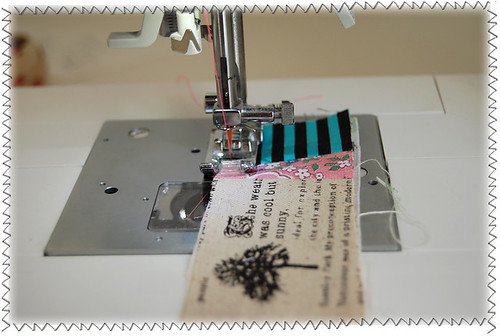
After ironing the scraps, I sewed them up, making sure seam allowances are about 1/4".
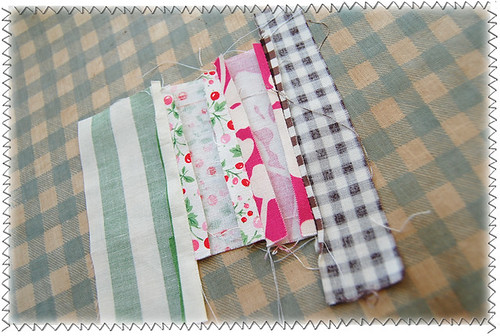
Then I opened and pressed the seam allowances.
Now I cut each patchwork panel into approximately 1 3/4" x 4".
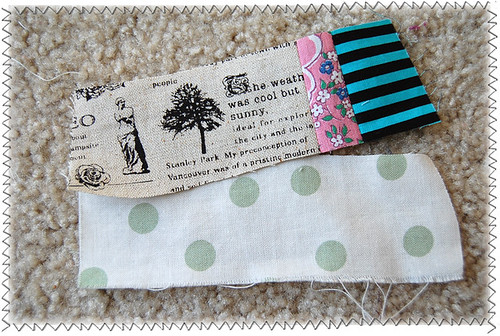
For each panel, prepare a scrap that is cut into about the same size. Here, I recommend using light-weight cotton fabric.
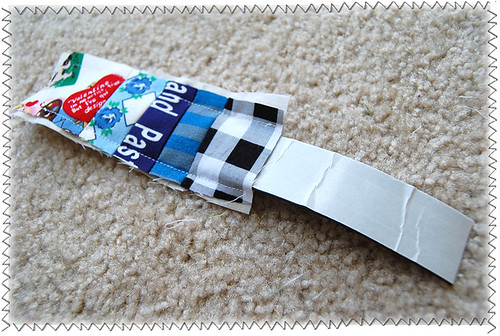
With WRONG sides together, I sewed all around, making sure to leave one short edge unsewn. I also made sure that the width between the two long stitching lines are about 1 1/4" so that the 1" width magnet can be easily inserted.
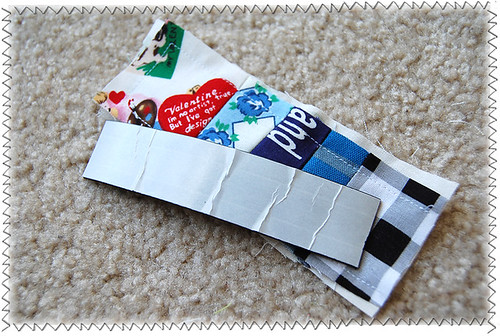
Then I cut out magnet into 3.5" length.
I then inserted the magnetic tape in there. Here if you use magnetic tape with adhesive, I suggest that you make sure to insert it in the way that the raw magnet part faces the back side.
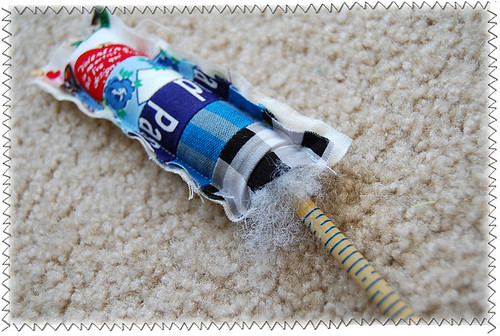
Fun part! Fill it with polyfil. Lots and Lots of polyfil gives it a nicely puffy and firm look, so don't hesitate to use a lot of it! I use a chopstick to press polyfil further. Make sure to put polyfil to only FRONT side of the magnet. Between the magnet and the back panel of the fabric, there should not be any polyfil..
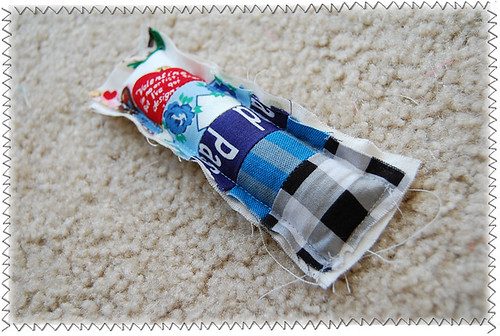
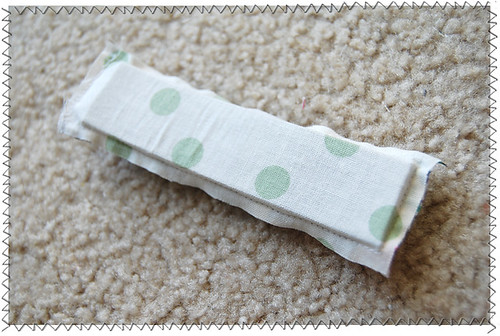
Time to sew up the opening now.
Now trim the edges. It might be fun to use a pinking scissor here!
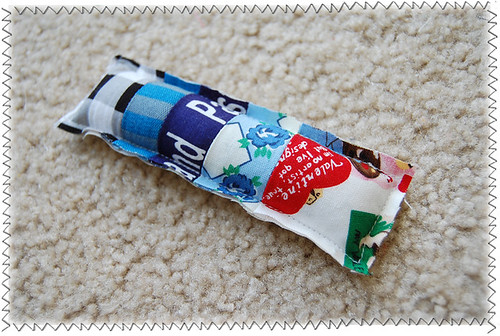
This is how the back side looks like..
Now let it stick to your refrigerator and have fun!
Oops! time to go..!
I hope this tutorial was clear enough and is something you want to try out ;)
Hi all. How are you all doing? I'm sorry I was so quiet for a while here. Thank you so much for your lovely, thoughtful comments, e-mails, and letters that always cheer me up! I just needed a little break for some reasons, but I am back now and am so super thrilled to finally share with you guys this excitement!
Yeah! my handmade tote bag made the cover of the Fall issue of Stitch magazine!!!! Hooray!!!!!!!!! Had I ever thought about seeing my own sewn item in my favorite magazine in a bookstore?! I can still hardly believe this really happened. I am so happy to be part of the crafty contributors that I have been admiring for a long time like Rashida of I heart linen. (Go check out her blog if you love to stumble upon a place that inspires you, although I doubt there are many of you who haven't checked it out... her work is just incredibly beautiful.)
I would say that I am probably not the one that was excited the most about this magazine coming out. Joe was checking out the bookstore like everyday since a week before it got published. When it became available, he got overly thrilled and couldn't help telling the bookstore staff that the bag was made by his girlfriend and rushed back to work and showed it off to every co-worker he encountered in the day. LOL. I really think I am so lucky to have met this guy.
I thank all of you who have continuously encouraged me to get crafty and to allow me to share my work with you guys. Thank you, thank you, thank you all!!!!!!
Thanks for stopping by my blog! My name is Ayumi. I love sharing my crafty journal and other little anecdotes in my life here. I am a mother to two kiddos and a wife to my best friend. We live in Seattle currently. I hope you enjoy being here :) Welcome♪