


Oh my gooodness! You guys are just the sweetest people ever!!!
It's so super nice to know that I have people like you who
are as happy as I am (and Joe is) about the contribution to
the Stitch magazine. I still carries the mag with me everywhere
I go because looking at it not only does remind me of the happy
thing that happened to me but also makes me think of you guys,
how warm, supportive, and encouraging you guys have been..
and that just makes my day. So a BIG thank you for all of you!!!!

By the way, I am so bummed that I missed out the Scrap Buster Contest.
I thought the deadline is the end of this month, but I just found out
that the entry has been closed since the deadline was the 23rd of October.
Ouch! You may have had enough cool tutorials that use up scraps by now,
but I made a little quick tutorial anyway, so let me share it here today..
This is really one of the quickest things to make that I can think of
that is decorative and practical and can be a little last-minute gift.

I used this magnetic tape (1" width).
It doesn't have to have the adhesive tape;
as long as it's a magnet that can be
cut into your desired sizes that would be great ;)

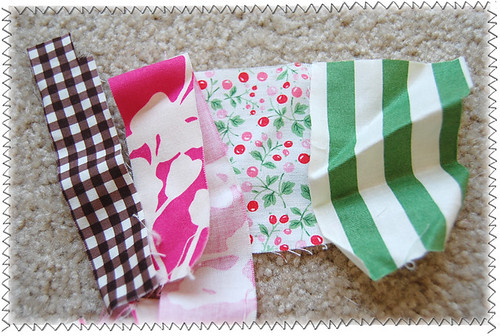
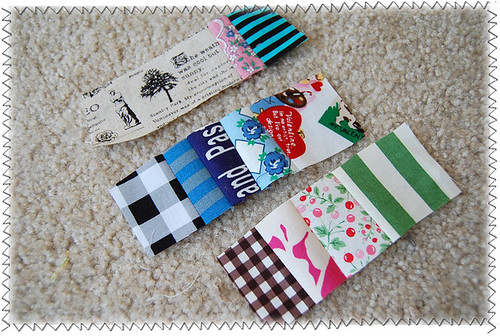
I grabbed some scraps that match well together.
Sizes of scraps don't matter as long as the length of each scrap is
at least 1" longer than your finished project.
Here, each scrap of mine had to be at least 2" in length.
Here is another combination I came up with.
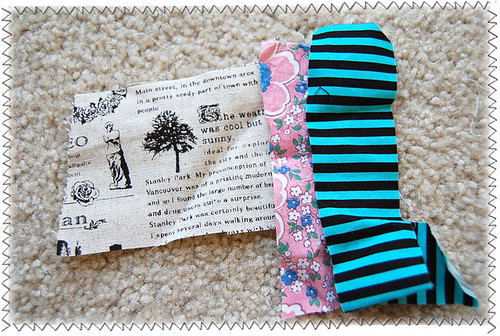
And this one.
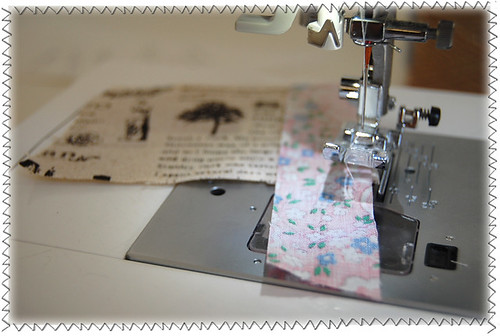
After ironing the scraps, I sewed them up, making sure
seam allowances are about 1/4".
Then I opened and pressed the seam allowances.
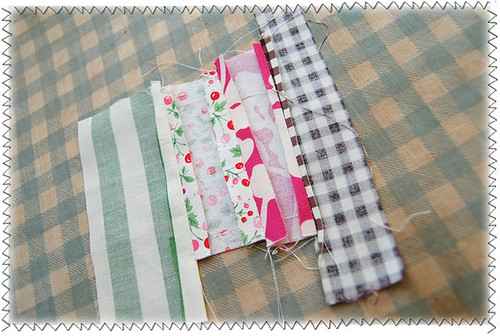
Now I cut each patchwork panel into approximately 1 3/4" x 4".
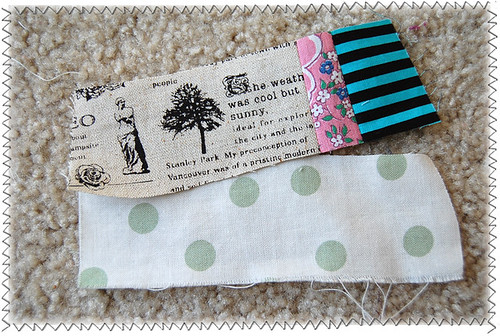
For each panel, prepare a scrap that is cut
into about the same size. Here, I recommend using
light-weight cotton fabric.
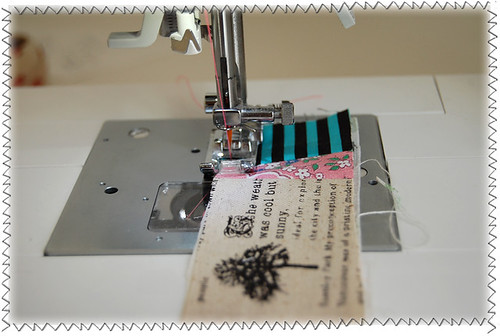
With WRONG sides together, I sewed all around, making sure to leave
one short edge unsewn. I also made sure that the width between
the two long stitching lines are about 1 1/4" so that the
1" width magnet can be easily inserted.
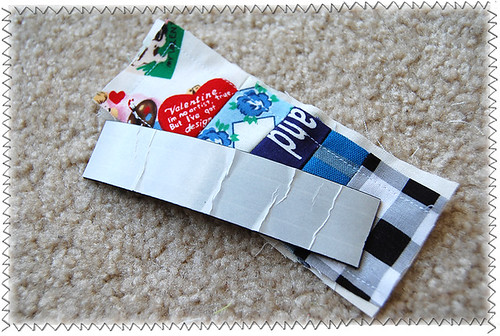
Then I cut out magnet into 3.5" length.
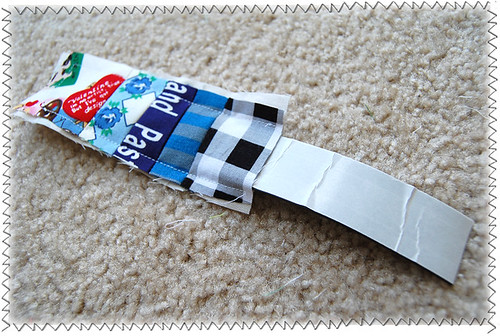
I then inserted the magnetic tape in there.
Here if you use magnetic tape with adhesive,
I suggest that you make sure to insert it
in the way that the raw magnet part faces the back side.
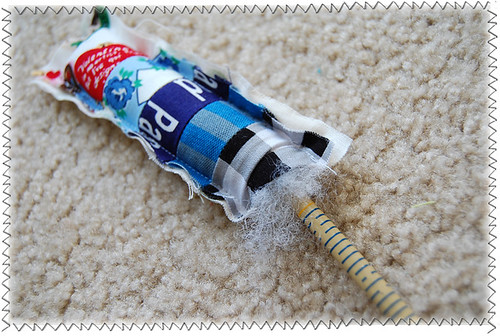
Fun part! Fill it with polyfil. Lots and Lots of
polyfil gives it a nicely puffy and firm look, so don't
hesitate to use a lot of it! I use a chopstick
to press polyfil further. Make sure to put polyfil
to only FRONT side of the magnet. Between the magnet
and the back panel of the fabric,
there should not be any polyfil..
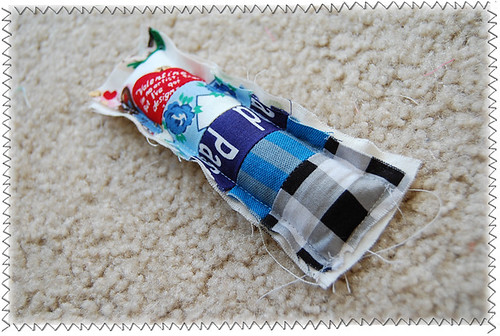
Time to sew up the opening now.
Now trim the edges. It might be fun to use a pinking scissor here!
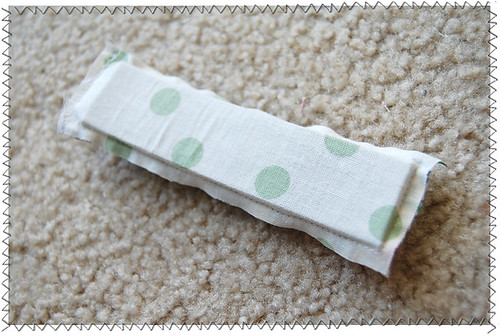
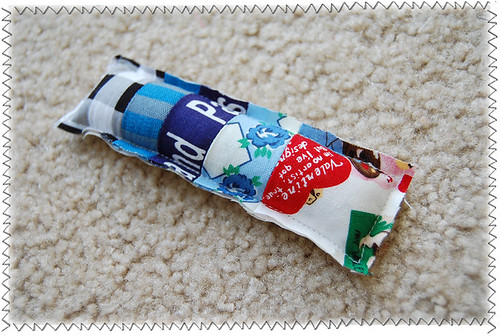
This is how the back side looks like..
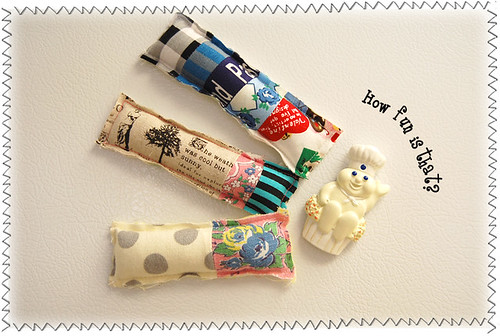
Now let it stick to your refrigerator and have fun!
Oops! time to go..!
I hope this tutorial was clear enough and
is something you want to try out ;)
I'd love to see yours in this flickr pool.
Thanks for coming and reading!!

 |


I have some magnet tape, what a great idea. Yours are gorgeous!
ReplyDeleteWhat a great way to use up scraps and decorate your fridge! These would be good for school fairs and such!
ReplyDeleteThanks for the idea!
MGM
Oh my gosh - these are sooo cute!! Love them!
ReplyDeleteJust adorable! Just goes to show you that no scrap is too small! These will make great stocking stuffers and "enclosures" the this year's holiday packages.
ReplyDeleteI'm in love! These are the cutest little magnets!! I posted a link to your tutorial on Craft Gossip Sewing:
ReplyDeletehttp://sewing.craftgossip.com/tutorial-patchwork-magnets-from-scrap-fabrics/2009/10/28/
--Anne
Cute, cute, cute! Thank you for this tutorial! ^__^
ReplyDeleteThat is very cute. I never heard of magnetic tape, can you believe that? Now I really want some of it, I can think of a lot of fun things to use it for! Thanks for sharing.
ReplyDeleteVery funny tutorial! Cute magnets, thanks for sharing
ReplyDeleteIt's very fun and very nice!!!
ReplyDeleteVery fun! Sorry you missed the sms contest - this is a great tutorial! You could still vote, though ;-)
ReplyDeleteTHANKS YOU ITS VERY SWEET AND EASY TO MAKE.
ReplyDeletelove that! great christmas present idea!! i want to run home and make them now!!
ReplyDeletehooray for scrap projects! thanks !
ReplyDeleteadorable! i'm doing this!
ReplyDeleteSo cute- thanks for the tutorial!
ReplyDeleteHow dang cute are those? Great job!
ReplyDeleteThis is sooo fun! Thank you for sharing! Have a lovely merry happy weekend and love to yoU!
ReplyDeleteThose are super cute. What a fun coversation piece. I'm bummed you missed the contest but thrilled you're sharing the tute with us! I'll be linking.
ReplyDeleteAdorable idea--and a great way to use up those tiny scraps. Thanks for sharing! :)
ReplyDeleteFound you via One Pretty Thing. These are DELICIOUS!! What a fun project!!
ReplyDeleteVery cute!
ReplyDeletecute way to use up scraps!! i may make a few!
ReplyDeletethis is great! and even more, these would make excellent pincushions/pin collectors for people like me who always has them scattered everywhere!
ReplyDeleteOh fun!! You always have such great tutorials, thanks for sharing them with us :)
ReplyDeleteThis is a great idea, thank you so much! I am already off to my sewing machine. Greetings from Germany
ReplyDeleteThose are adorable, thanks!
ReplyDeletelove it. love it. love it.
ReplyDeleteLove it! Such a great and FUN way to use scraps of leftover fabrics! I guess you could also try different shapes (hearts, squares, circles, xmas trees, etc etc etc), but the basic idea is fantastic!
ReplyDeleteI had not found such an original and fun blog in a very long time...You are doing great!
ReplyDeleteThis tutorial is so much fun! It will be great for leftovers of my favourite fabric. Thanks for sharing!
ReplyDeleteThank you so much everyone!!!
ReplyDeleteI agree with your point, please share with us more good articles.1991 Mitsubishi Pick-up Truck AC Compressor
ReplyDeleteOh thanks for the idea, these magnetic scraps rules so hard! don't think it?
Delete