
These placemats are just so much fun to make!
I hope you'll sew up some too!
Here is the tutorial for making a single
placemat and a potholder made in a very
similar way. As usual, seam allowance is 0.25"
unless otherwise noted. Here we go!
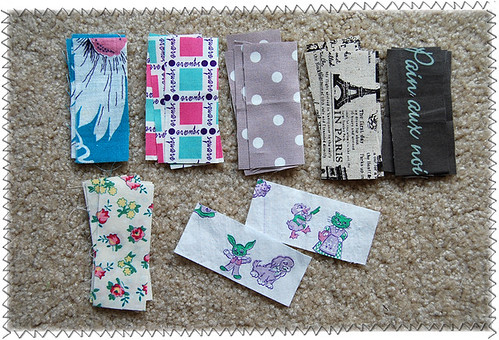
Cut out 26 pieces of fabric pieces, each measuring
1.5" x 3.5". I cut out 4 pieces from 6 different
fabric and 2 pieces from the interesting fabric.

Lay out the pieces of fabric to come up
with 2 sets of panels made with 13 pieces.
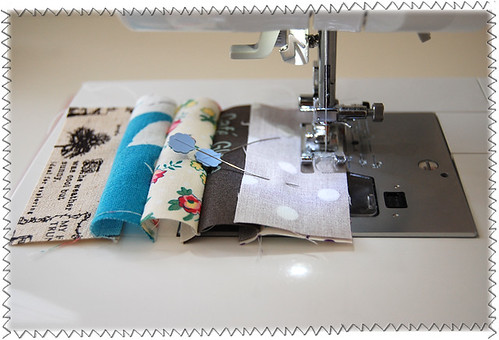
Sew them together.
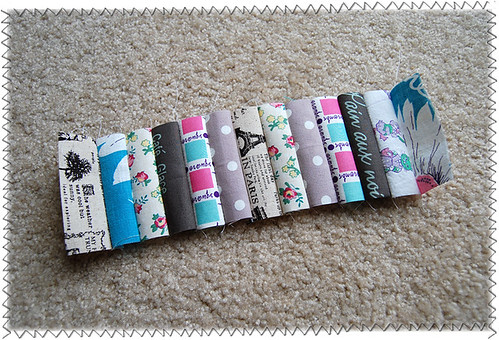
Fun!

Press seams open.
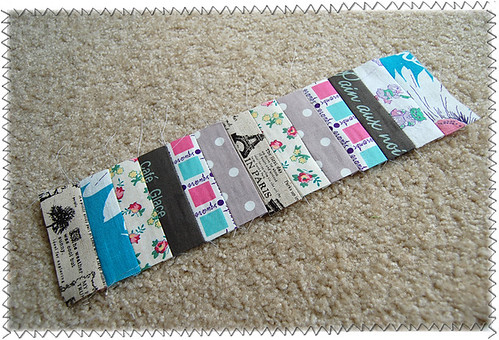
Now it's nicely flat!
Repeat the same process for the
other 13 pieces.
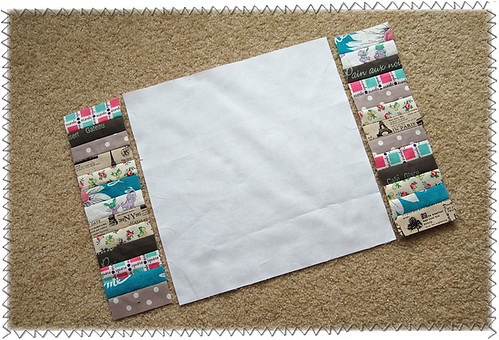
Cut out 13.5" x 13.5" square from white Kona.
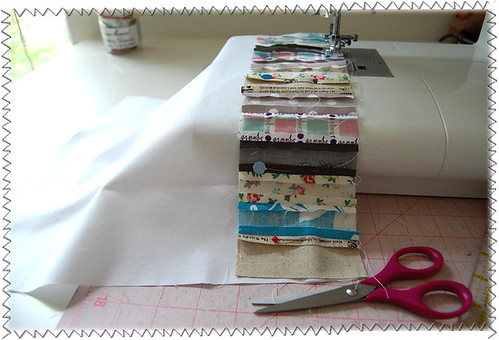
Sew the patchwork panels to the sides.

Press seam open again.
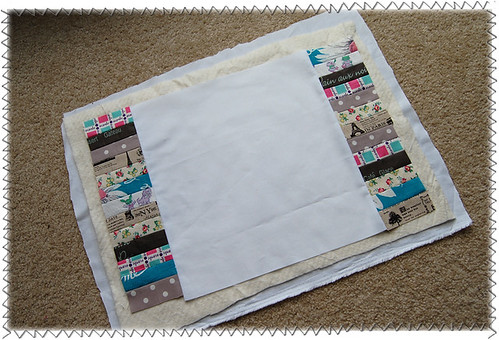
Cut out a piece of cotton batting a bit larger
than the top panel, then cut out a piece
from the same Kona white even larger than
the cotton batting.

Use quilter's basting spray to make
the sandwich nicely attached to each other.
(It's not necessary to use this spray,
but it will make quilting process
about ten times easier.
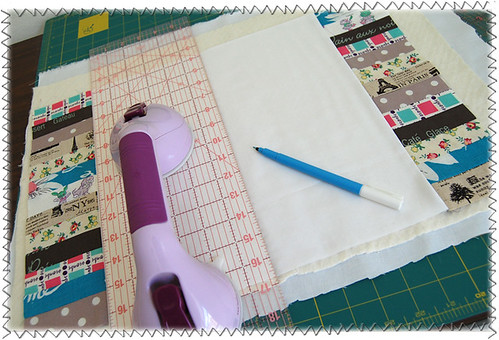
Now using a water-soluble pen,
draw one line like this in the
center of the placemat.
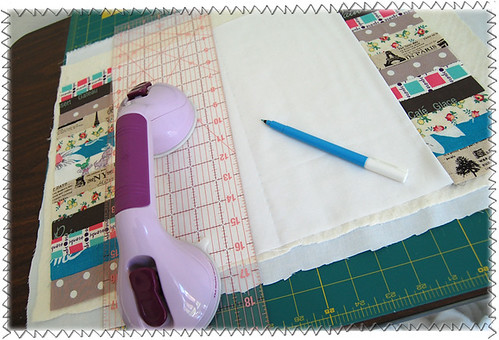
Just one line should be good enough ;)
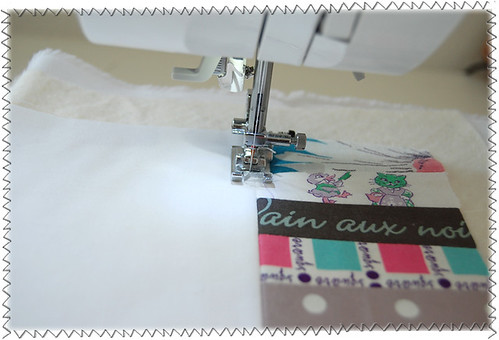
Quilting time ;)
I like to start from here to secure the edges.

Then I sew very close to the edge
on the side. I repeat the same process
for the other side.
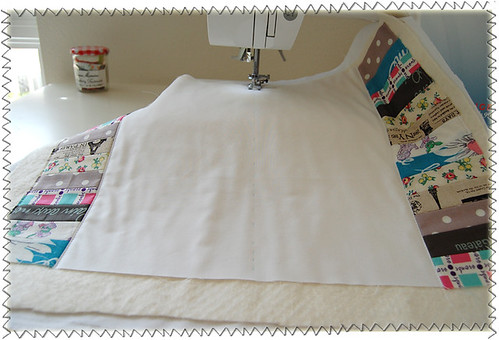
Then start quilting from the very middle
where you drew a line.

From there, go towards left and right
making parallel quilting lines.

After quilting all the way to the
sides, trim excess.
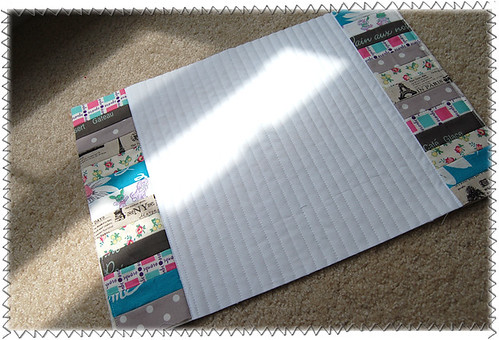
It looks much better now ;)
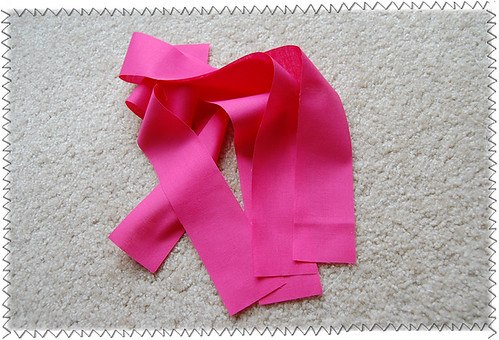
Now let's make a binding tape.
You can purchase already-made one
from a local craft store, but if you'd
rather make it on your own, then follow me :D
Cut out 4 strips measuring 20" x 2" each.
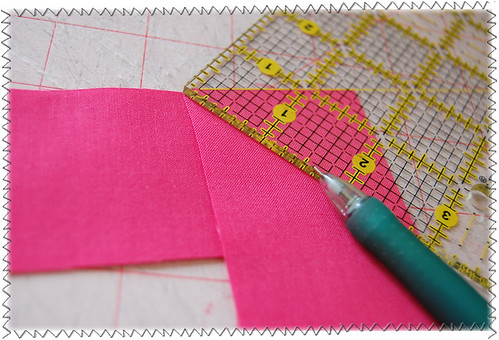
Now we'll sew the strips together.
Draw a diagonal line at the edge of one strip.
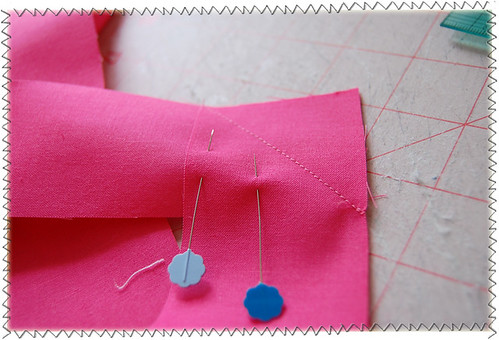
Sew along the line.
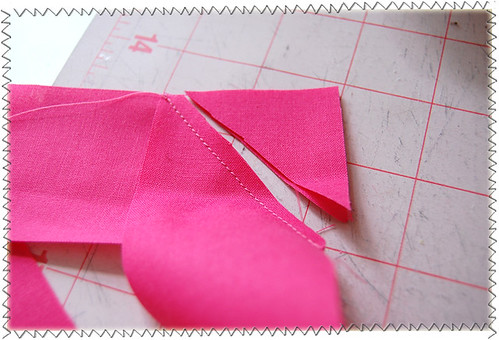
Trim the excess. Repeat the same process
to create one long binding tape.
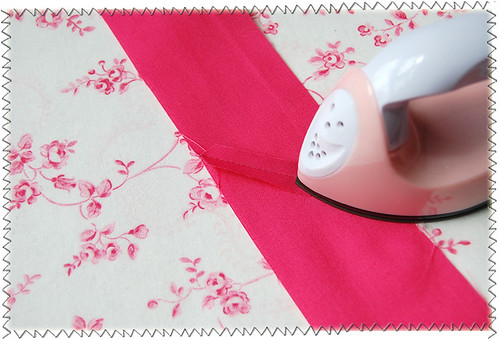
Press seam open.

Press to make a fold at one end.
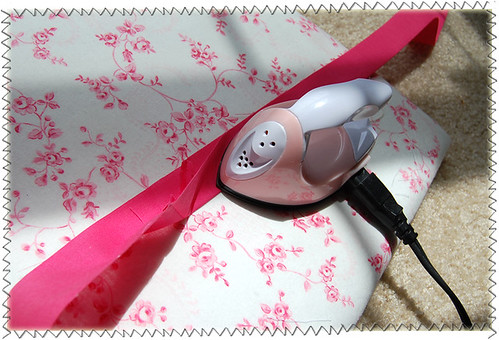
Now fold the tape in half and press.
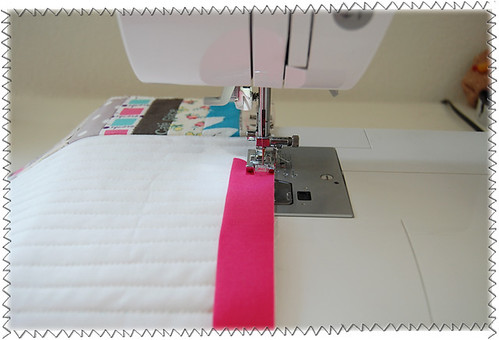
Yay! It's time to attach the binding
onto the placemat. We'll start from the end
that is folded. Align the raw edge of
the tape to the edge of the placemat and
start sewing.
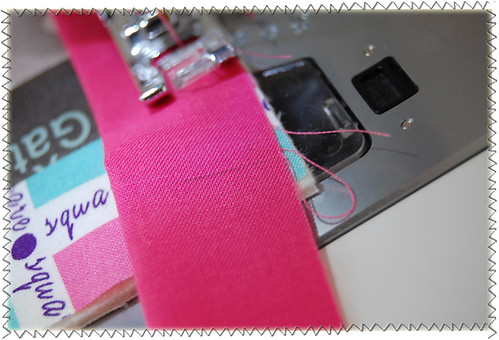
When you are about a few inches from a corner,
stop there and use a ruler and a pencil to
draw a line at 0.25" from the edge.
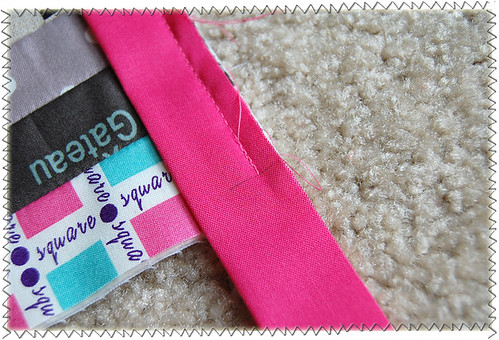
Stop at the line and back-stitch.
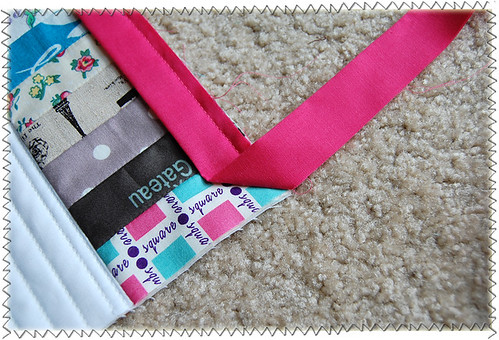
Now fold the tape like this.
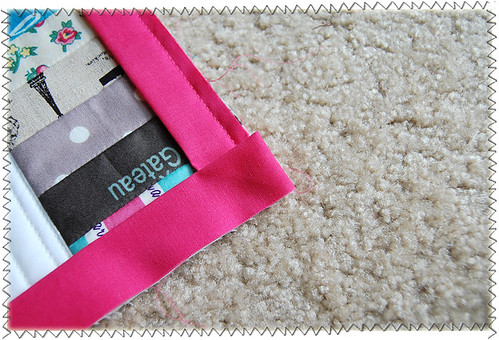
And fold like this, making a folded triangle inside.
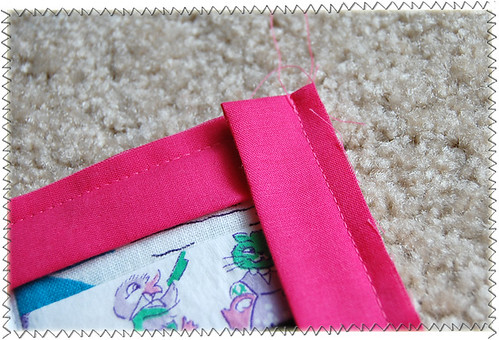
Then sew from the very top edge.
Do this for the rest of corners too.
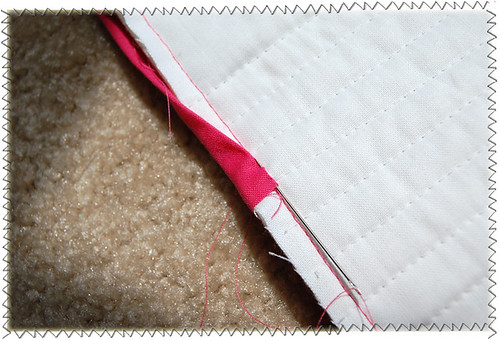
When you are almost done with sewing the
bias tape on to the placemat, make sure to
sew about 0.25" on top of the part that you
started then trim excess.
It should look like this now.
I really like the look of binding tape
attached by hand, so I prefer hand-sewing
in this process. You might need to sew it
on using a machine if you are working on
last minute gifts because hand-sewing could
take some time, although it's fun.
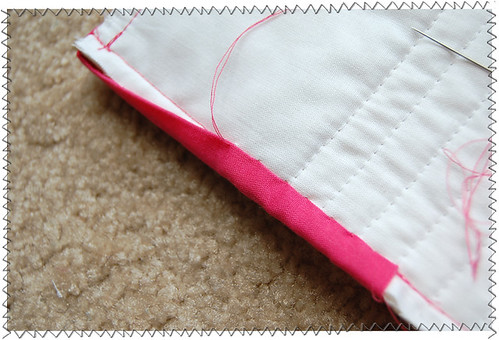
Just like this, as I go along, I make sure
to cover up the stitching line.
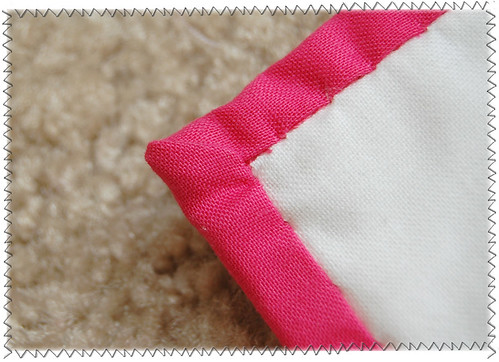
This is how the corner on the back should look like.
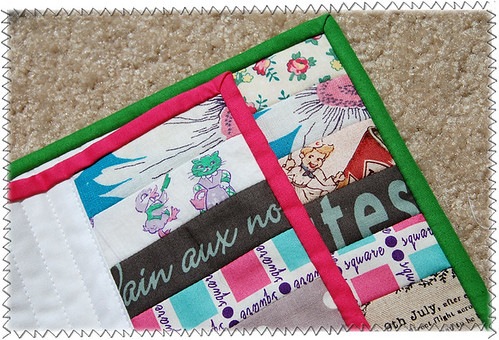
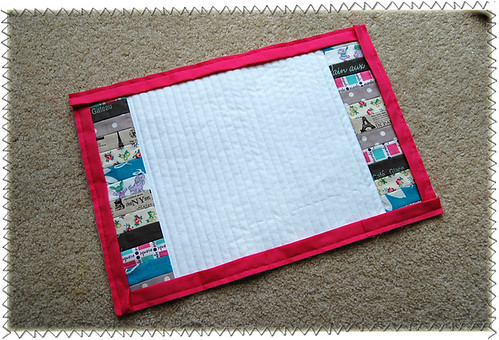
Then you're done :D Hooray!!
Do you happen to feel like making a little
version of it? Maybe a potholder?
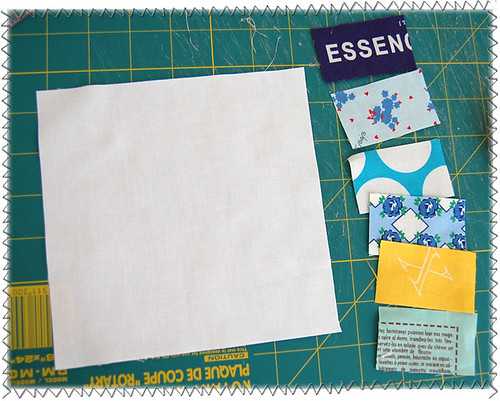
I cut out 6 pieces of fabric measuring 2.5" x 1.5"
each and one piece of Kona white of 6.5" square.
I used pretty much the same method throughout
except that I added a little string and
replaced cotton batting with heat-resistant batting.
(I needed 4 strips of pieces measuring 2" x 9"
to make a binding tape for this.)
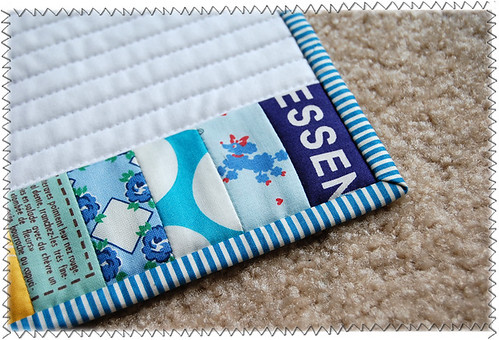
I like this as much as those placemats :D

Thank you so much for reading such a long post!
I hope you'll make something using this tute
and share your creations in the flickr pool!
Now I can't wait to see yours!!

Have a great crafty day!


wow, how cool is this! I am more a scrapbooker, but I have a sewing machine and I am tempted to start with one of you projects, they're so well explained.
ReplyDeleteThank you very very much!!!
Love It
ReplyDeleteThank you for the time that you took making this tutorial, it is absolutly well done.
Thank you
Muchas gracias.... Gracias a ti he cogido cariño al patch, con tus explicaciones haces que todo sea más fácil.
ReplyDeleteGracias y besos.
Grazie del tutorial!!!
ReplyDeleteThank you!!!!
Simona
Thank you so much! You made my day! I am going to try this as soon as possible!
ReplyDeletethank you so much for this lovely tutorial! Your placemats are truly gorgeous, I love the choice of fabric on the side strips!!!
ReplyDeletehugs federica
Thanks for the great tutorial! They are gorgeous!
ReplyDeleteyou are awesome. can't wait to make these!
ReplyDeleteThank you for a new tutorial. Must start thinking about Christmas sewing.
ReplyDeleteI am with the rest of the comments, THANKS!
ReplyDeleteI make holiday placemats for my daughters, These would be wonderful! And the potholders, cool, never even thought of making those.
thank you for the tutorial, those will make a lovely christmass gift for my mom-in-law :)
ReplyDeleteThank you for the tutorial!. You make it seems so easy!
ReplyDeleteHugs from Spain
Liliana
This is a beautiful tutorial, Thank you.
ReplyDeleteOoh, fun!
ReplyDeleteThanks for sharing the tutorial :)
so beautiful Ayumi, thanks for joining the fun. :)
ReplyDeleteAdorable!!!
ReplyDeleteThanks for the great tutorial. I just started an oven mitt last night and the pot holder will go along nicely with it!
ReplyDeleteThank you so much for this tutorial!
ReplyDeleteThanks for this tutorial! I think I'm going to try making my own binding tape when I make some of these, it looks fun!
ReplyDeleteThank you for this tuto!! Really love your work. Greetings from Spain.
ReplyDeleteSo lovely and simple looking. Thank you for a fantastic tutorial.
ReplyDeleteLove these place mats! Thanks for the tutorial!
ReplyDeleteThis looks like fun, Ayumi! I always love your tutorials...so easy to follow. Love your fabrics too ;)
ReplyDeleteSuper cute! Great tutorial, I have been wanting to make placemats for our table for quite some time and have never made the time to do it. Maybe a goal for the long holiday weekend.
ReplyDeleteThis is so great Ayumi! I especially love the bonus "mini" version at the end. Can't wait to give this a try!
ReplyDeleteYour tutorials are always so brilliant!! Thanks SO much for doing this one. I have made all but the camera bag - scared of binding - but you've made it look so straight forward with this that I'll be giving these a go!
ReplyDeleteWell done!
You make it seem simple and doable. Thank you!
ReplyDeleteI have a question about binding. Can you explain what you did between machine stitching the binding and hand stitching? Did you fold the binding over the mat's edge and hand sitch on the other side?
~A newbie sewist
A wonderfully photographed and explained tutorial, as always! Thank you Ayumi, for sharing.♥
ReplyDeleteOk where did you get that adorable iron. I must have one!!
ReplyDeleteThank you, everyone! I really can't wait to see your placemats/potholders!
ReplyDeleteerica-
my favorite fabric is the he-loves-me one! Thank you for sharing such amazing vintage fabric!!
The Print Lover-
Yes, you are absolutely right. I did fold the binding over the edge of the placemat. By doing so, the folded part comes to the edge ;)
Thanks everyone!
ReplyDeleteMindy-
If you live in the US, the iron can be spotted at local retail stores of Joann. Otherwise, you can find it here.
Here's my version of the potholder.http://mamabeefromthehive.blogspot.com/2010/04/pot-holder-how-to.html I will be doing some place mats now too! I like the cleanness of the white you used. I have little people though, perhaps I'm better off with more pattern :) thanks.
ReplyDeleteThis is a great tutorial, thank you SO much for sharing! :)
ReplyDelete~Sam
Great tutorial (and the photos were super). I'm off to make potholders.
ReplyDeleteHugs - Marie
Thanks for this great tutorial - but you know what really knocked my socks off? Your use of the suction gripper on your perspex omnigrid ruler! OMG - inspired!!! I have problems pressing down on my ruler when I am cutting and I reckon having a suction gripper like that would make it easy to keep a steady even pressure on the ruler when I am cutting. I am off to the homebuild store at the weekend to look for one.
ReplyDeleteThanks again for the great tutorial! Your instructions are always very clear & precise with lots of images - just awesome! そして布あわせが何といっても素敵です~。今回は特に Binding tape の作り方、縫い方、がとても参考になりました。私はハギレの量だけは人に自慢できるほど持っているので(笑)今回の作品、是非作ってみたいです。いつも本当にどうもありがとう♪
ReplyDeleteThanks for sharing it! you're great!
ReplyDeleteYou made it look so easy! I love your fabrics to. Thanks for sharing your tutorial. Jenn
ReplyDeleteHow cute!!! Yes I would love to make some as gifts...my list just gets longer with todo.
ReplyDeleteThanks for sharing
Have a God Filled Day
Shirley
I am a big fan of your tutorials and this one comes at the perfect time because I was looking for an idea to make new placemats. Now I know this is just what I will do. Thank you so much for taking the time to share your beautiful designs, you are such an inspiration!
ReplyDeleteTHANK YOU SO VERY MUCH!!!!!!!!
ReplyDeleteThese are amazing!
Please advise what fabric is th eone with:
:Cannelloni Accompagnes: writing on it.
Best regards
Sophie
Wow - they are gorgeous. It's probably a good project for my first attempt at quilting, so I'll add it to my incredibly long list of crafts to do!
ReplyDeleteI'm following you now!
Thank you for such a detailed tutorial. I don't know how you had the patience with uploading so many pictures! :)
ReplyDeleteI will have to make some placemats for myself because your's turned out so nice!!
What a great project! I will definitely be making these for my daughters new house. Thanks for posting!
ReplyDeleteThanks for another great tutorial Ayumi! Your mats actually inspired me months ago to make my own version. I have just posted about them on my blog:
ReplyDeletehttp://jellybeanlupin.blogspot.com/2010/05/placemats.html
Looking forward to being inspired by you again soon
Jenny
I love this project and made a potholder sized one yesterday, however I had a little bit of trouble with the coners of the binding on the back. Could you possibly post a pic of the back of one of the place mats or pot holder? I want to make a million more of these but my corners are crazy. Thanks for the great tutorial.
ReplyDeleteNice tutorial! Thank you for sharing. You've got a typo (just one like should be enough--> should be "just one line").
ReplyDelete:)
Love it. Cant wait to make it.Thanks
ReplyDeleteLove these! Your mitered corners look fabulous - any tips that you'd like to share on how you do them so neatly? Also, what marking pen do you recommend? The ones I've tried aren't always "erasible!"
ReplyDeleteAWESOME!!! I can't wait to give this one a try. What a great tutorial!
ReplyDeleteThis is SO PRETTY!!! I linked to your tutorial on Craft Gossip Sewing, scheduled to go live tomorrow morning:
ReplyDeletehttp://sewing.craftgossip.com/tutorial-scrappy-quilted-placemat/2010/05/29/
--Anne
you are the best tutor ever..!
ReplyDeleteI am going to start making it now! I love this project! Thanks for sharing.
ReplyDeletethanks a lot!
ReplyDeleteThat tutorial is excellent! Good photos, explained step by step and with a very friendly approach. Thank you so much!
ReplyDeleteThank you everyone! I can't wait to see your placemats/potholders!!
ReplyDeleteAdy-
I found the gripper at a local fabric shop. It is called the Gypsy Gripper and you can learn about it more here. I think it makes a pretty big difference. Not only that it keep the ruler from slipping but that it can protect us from cutting our hands by accident ;)
Megan-
I'm so excited to hear you've made one! yay!
I'll add a picture that shows how the corner looks on the back soon!
lilfish-
Oops! Thanks! I'm fixing it right away!
Marsha-
I think using a very narrow binding tape as in this case helps the corner turn out prettier. When I hand-stitch the binding to the corner of the mat, I focus on hiding the stitching line, and it comes out neat. As for the erasable pen, I recommend the one from Clover. It can be very easily erased when I dab a little water on it ;)
Sophie-
ReplyDeleteThe fabric is what I found in Japan a few years ago. It is designed by a Japanese textile designer Suzuko Koseki. I've been looking for the same print for ages but have not had luck. If you like fabric with French words, you might enjoy more fabric from her which can be found in here and here among many others. Hope this helps!
the placemats are adorable... thanks for sharing.
ReplyDeleteI love these. And your tutorial was excellent!!! Thank you for doing this!
ReplyDeletewow!!
ReplyDeleteawesome!!
you made a simply thing became so special..
thanks for shared..
happy crafting :)
cheers,
puri
so cute ! ^^
ReplyDeleteI do love your blog !
Hope oneday I'll do something awesome like this .
Thanks so much for sharing .:)
Let's keep in touch.
Ohh
THANK YOU SO MUCH FOR SENDING ME THE FABRIC DESINGERS NAME!
ReplyDeleteMuch appreciated!
LOYAL FAN :-)
Sophie
thank you so much!!!
ReplyDeletelooks so fabulous, i can't wait to try it!
you are the best!
xoxo
gigi
Hi Ayumi, thank you for another fun tutorial. Your instructions are always so detailed and encouraging. Hope you are having a lovely long weekend :)
ReplyDeleteamazing work! congratulations!!!
ReplyDeletei like it
ReplyDeleteWhat a fantastic tutorial. Photographed and explained so well, and they are beautiful just like everything you make. Thanks so much.
ReplyDeleteOlá.
ReplyDeleteObrigada por ensinar tudo tão direitinho.
Gostaria de saber de onde é, ou a marca do seu ferro de passar.
Ele é uma graça.
Beijos
The center section should be cut 13.5 x 13.5 :(
ReplyDeleteWhat a great tutorial! Thanks for sharing.. (^_^)
ReplyDeleteThanks so much everyone! I hope to see your placemat in this flickr pool ;)
ReplyDeleteDeborah- Thank you for pointing out on the mistake. I hope the wrong measurement didn't trouble you too much. I fixed it right away ;)
This is great! I am going to have to make some of these for my dining room. I think I'll have the kids even pick out their own fabric for their placemats. :) Thank you for such a thorough post with pics and explanation!
ReplyDeletemommyoftwo247.blogspot.com
Beautiful! These would make my kitchen so lovely!
ReplyDeleteCould you tell me about how far apart to make the parallel quilting lines?
ReplyDeleteThank you, everyone! I am looking forward to seeing your placemats in the flickr group ;)
ReplyDeleteThe parallel quilting lines are approximately 3/8" apart ;)
Thank you!
ReplyDeleteVera
http://berezka52.multiply.com/
lindo,maravilhoso!!!tentarei fazer um.
ReplyDeletehttp://www.flickr.com/photos/8884597@N04/
obrigada!!!néia de Florianópolis
Very lovely and cute
ReplyDeletehttp://craftaworld.blogspot.com/
Love
Farah
Great tutorial! And can I just say your little pink iron is so cute!
ReplyDeleteThank you so much for the wonderful tutorial! I finally finished a pair of these that I started in December.
ReplyDeletehttp://kunstlichekadi.blogspot.com/2011/03/placemats.html
Obrigada por este tutorial. Vai me ajudar muito, pois sou iniciante nesta arte maravilhosa.
ReplyDeleteBeijo.
Simone.
I agree with your point, please share with us more good articles.1994 Mitsubishi Pick-up Truck AC Compressor
ReplyDeleteWhats up, This is a wonderful summation, I located your blog checking google for any similar subject and observed this. I couldnt find as well significantly other tips and information on this posting, so it was fantastic to discover this one. I will almost certainly be returning to think about a number of other articles which you have written another time.
ReplyDeleteMitsubishi Ignition Coil
Quilted placemat is not easy to do. There's a lot of process to make it beautiful. I am so happy that you've done your work greatly. Well appreciated.
ReplyDeleteBeautiful placemats and potholder, but can you tell me, when you're finishing the bias tape on the back, how do you do you're stitches, its hard to tell because they are so small, mine are not like that, so i must be doing something wrong, is there anyway you can post a pic as you are doing it? I would appreciate, ive always wondered hhow people did there finishings and you couldn't see the stitches.
ReplyDeleteThank you sew much
Mary
sorry,
ReplyDeleteemail address is nana920@comcast.net
Thank you
i love your tutorial. thank you so much.
ReplyDeleteMake this kind of this is one of the hobbies of my sister she makes wonderful things with her imagination!
ReplyDeleteYour tutorial is explained so well. Thank you for sharing. I can't wait to start a project of making placemats and pot holders.
ReplyDeleteThese are lovely - can you help me with making these for a ROUND TABLE - you know how hard it is to keep a square placemat on a round table - sometime in the future will be great
ReplyDeleteThank you! Unfortunately I will not be able to write a tutorial on this for a round table, but I bet it will be easier to keep placemats on a round table if you make these smaller and make the corners round. Hope this helps ;)
DeleteThank you for such a detailed tutorial :-)
ReplyDeleteVery good tutorial, with clear explanation and photos. Thank you
ReplyDeletePlacemat use to protect the surface of the table. This installed each place setting at a table. It is better to make our own placemat if we want personalized and with the help of this detailed tutorial, sewing of this makes easier.
ReplyDeleteSandy from Florida, USA--- Thanks for the GREAT tutorial!! I love this idea & will be using it for Holiday Placemats! Thanks again!!!
ReplyDeleteI made a couple of these for a donation to Meals on Wheels that we challenged our guild to. They received tons of remarks on how beautiful they were in their simplicity. I posted a (horrible) photo on my blog and linked back to your tutorial. I hope that's okay.
ReplyDeleteAyumi,
ReplyDeleteThere's little that hasn't been said above; what a multitude of comments...
Your project is professionally accomplished, your design is unique and pretty, your photography clear, your methodology precise and detailed. In addition, your response to any corrections (aren't we ALL so human!), are polite and timely.
I'll post and link your tutorial to my potholder site next week.
Thank you so much for your time, efforts and the learning you've shared.
Danielle
Ayumi, hello! I'm brazilian!
ReplyDeleteYour patches are perfects! You are generous in put it here!
All are so pretty!
Thank you!
Olinda
Such nice clear photos and a great tutorial. Love the little pink iron. Thank you so much.
ReplyDeleteInstead of sew the left and right patchwork one by one, can I cut a long piece of fabric, sew and then cut in the middle with rotary cutter...I'm not good at sewing, so I think this way, for me, it'll be equal both side ^.<
ReplyDeleteThat would work completely fine! I just used some fabric I wanted to fussy cut, so I did it this way, but if you could do the way you said, you could save time :)
DeleteWhat a great project, but even more so when the instructions are so good, clear and precise, no chance of never finishing the project. Thank you for your time and efforts.
ReplyDeleteI have never quilted before. I think this is a great starter project. Thank you for sharing your talent.
ReplyDeleteThis comment has been removed by the author.
ReplyDelete