 I'm so glad that I can finally sit down, relax, and update my blog. For the last few days I was totally overwhelmed with the preparation for my presentation, which I just got done with. I was dying to say something on my blog, because a lot of great things happened to me. Now that I am done with the stressful schoolwork, I can spend some time to write here. Hooray! Anyway, these are what happened.. 1) I participated in SMS Tutorial Contest and submitted this my very first sewing tutorial. (Can be seen here).  2) Surprisingly, Craftzine put the link to the tutorial too on their blog here. 3) A lot of visits and sweet comments! I was so happy to see my tutorial's link on those blogs. I love those blogs. The first thing I do in the morning is to check their pages to see what's up. I used to subtly enjoy reading their daily crafty news that always inspired me. I never thought about seeing what I made especially on Craftzine. I really did say "Oh My Goodness!" when I saw my little camera case on such a famous blog. Because of the help from those two very popular craft blogs, a lot of people visited my blog! Yeah! When I just started this blog, there used be about 5 visits per day, and I knew exactly who they were: Me from home, me from school, my boyfriend from work, and some of my friends who I specifically asked to visit here. lol. But now the total visits hit over 1000!! It's like I made a huge jump! I am so glad that some people discovered this blog from all over the world. The comments I've received are so sweet too. It really does cheer me up when I read comments from you guys. Thanks so much for Sew Mama Sew! and Craftzine and all those people who were curious enough to visit here and, of course, all of you who gave me comments. Thanks a million !! Alright, too much talking. I don't have a new sewing project to show here today, but I have this. 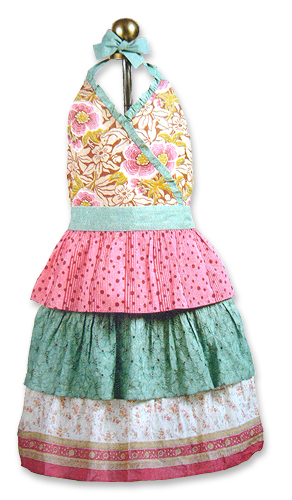 Isn't this apron pretty? This is from Paper Source 2007 Holiday catalog. I love the combination of these spring color fabrics. There are other versions too, but this is by far my favorite. Hopefully, I'll show my newest project here next time. Thanks for reading!  |

 |  |  |
Wednesday, April 30, 2008
Thanks to all
Saturday, April 26, 2008
Recent Faves on Flickr
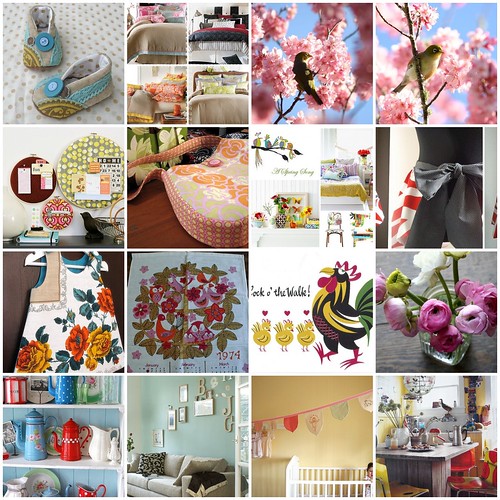 I promised some people that I would put up some pictures of Joe (my boyfriend) here, but today was one of those days my camera is not being nice to me.. All the pictures I took for the hope to show here turned out too blurry. Photoshop didn't help. I gave up. But instead, I put up my recent favorite finds on flickr! I love flickr. I have to visit the website as many times as possible throughout the day . This is a perfect place for me to find inspiration for my craft ideas and learn to take good shots. --------------------------------- Sewing wise, I have the long list of what to make in my head, but I think I have to stay away from my sewing machine until this coming Wednesday, when I have a presentation in one of the classes I'm taking. I am really not looking forward to it, but I can't wait for a trip to a thrift store that I am planning to go on right after the presentation. Wish me luck to pick up some goodies!  This is what I found at a thrift store in Seattle and I treasure it. 100% Linen: made in Ireland. Thanks for reading!  |
Thursday, April 24, 2008
| Logcabin Pouch |
 I found these at Stanford Shopping Center today. Can you guess what these are for? These squirrels are watering cans! As you can see there are holes for water to come out on the walnut they are holding preciously. I live in a apartment with no gardens, so there was no reason for me to get this, but I had to tell myself one day I'll have a beautiful garden with this cutie saying hi to us every day.. One day... --------------------------- I added a list of my favorite blogs on the right. Now I can easily jump to those blogs daily! I will later add more blogs. There are so many inspiring crafters' blogs out there, so it's hard to keep track of them all. --------------------------- 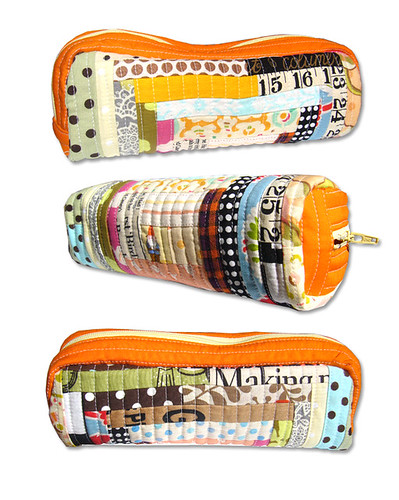 I made this log cabin pouch for a custom-order! I'm not finished yet. I still have to do some binding inside the pouch to complete. I'm pretty happy with the choice of fabrics. I like the project that involves teeny tiny scrap of fabrics, because that's when I can finally make use of my collection of fabric scraps. When I create things with those scraps, I feel I accomplish something for collecting tiny scraps over time. This was my second time to make this pouch.(First one is here.) There are a lot of difficult sewing projects, but this is one of the toughest pouch pattern that I've ever come across. Making the log cabin is fine, but attaching the other part to it is really challenging, but the outcome is a reward that makes me smile;) Sewing is so much fun! Thanks for stopping by and reading!  |
Monday, April 21, 2008
| How to make a super simple camera case |
 Hello! This is my second posting! Yeah! I am really excited about exploring what I can do with this blog. Creating a new blog is so much fun. It's like having new home online. I have too much stuff that I wanna write about, but today I would like to talk about just two things: These birdies and a tutorial on how to make the camera case. I just found these wire-birdies in this shop. Super Cute! Aren't they? They are only 367 yen: less than US$4 each. Unfortunately, they are sold out... One thing I like about Japan is that I can find a lot of things that are so cute that it's hard to resist. Finding pretty stuff does make my life brighter. ----------------------------- Ok, let me show you the tutorial. This is absolutely my first time to create a sewing tutorial in English. I might be missing a lot of details... If there is anything not clear, please let me know!  The only materials needed are fabric(outer and inner), bias binding(you could make your own or buy one), matching thread, and a button. 1) The first thing is to determine the size of your digital camera to see how big your final camera case needs to be. My camera is about 3 3/4"(width), 2"(height), and 1"(depth), so I cut out one piece of 8 x 5 1/2"fabric from each fabric: one for outer and one for inner. If your camera's size is about mine, you could cut out the same size's fabrics as mine, but if your camera is a lot bigger you might want to make the scale bigger, accommodating with your camera's size. I cut out the batting for the same size+ some extra width and height. Then, I sandwiched the batting between my fabrics so the right sides of the fabrics are outermost. After pinning the layers together, I machine-stitched like this (the width between the pararell stitch lines are about 3/8") and cut off the excess batting. 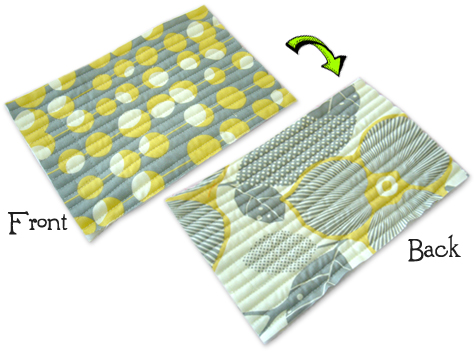 2) Then, I made 4 bias strips. (If you are using a store-bought one, please omit this step) Two tapes : 6" length Two tapes : 9" length Using a bias tape maker makes it a lot easier and quicker! 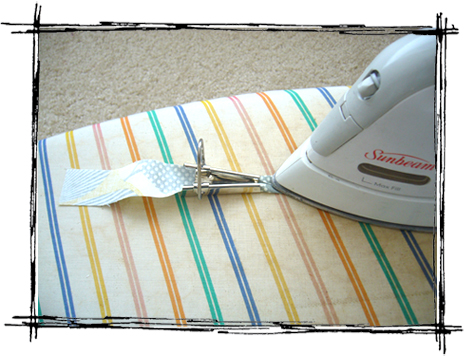 They should look like this after pressing. 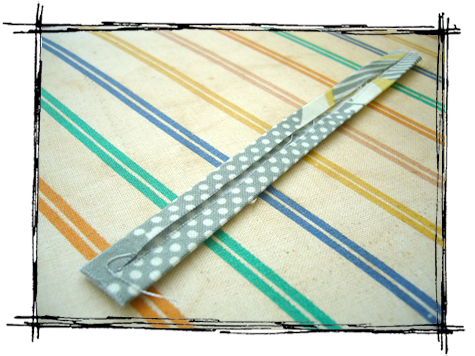 3) Then I attached the 6" bindings onto the width part of the sandwich. First, open out one turning on the binding and pin it along the edge of the fabric, right side together, then machine stitch along the fold line. 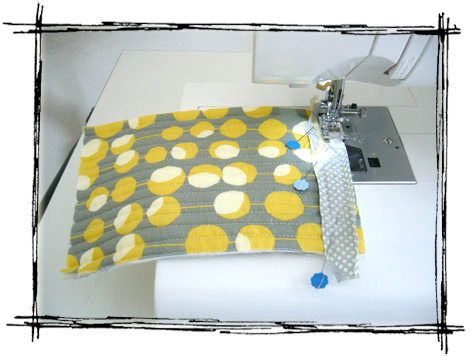 4) Then I folded the binding over the fabric edge to the wrong side, so the edge of the binding is just above the machine stitching. I slipstitched the folded edge of the binding to the fabric, catching up the fabric in the allowance, just above the machine stitching. 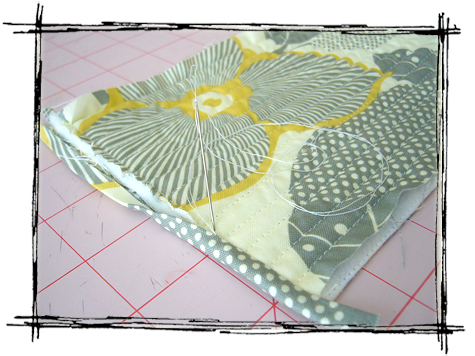 5) Repeat this for the other side too and cut off the excess bindings. 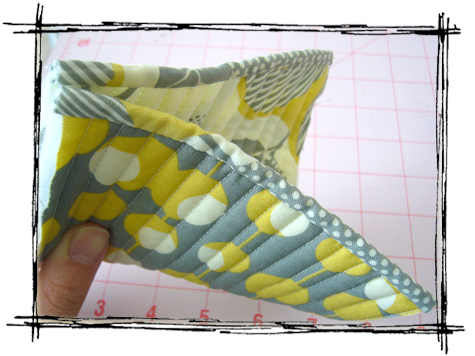 6) The next thing is to do is to make a pocket. I folded the sandwich to make the pocket whose height is 2 1/4" and based it. Then, I attached 9" bindings onto the sandwich. This time, I turned the both ends like this then machine stitched. 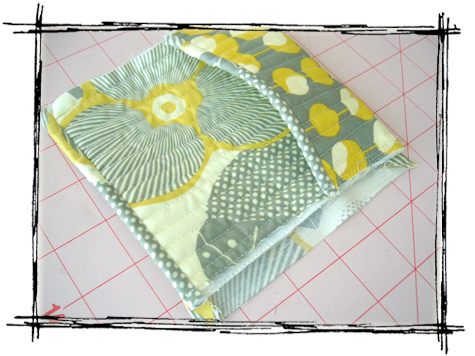 so that the corner looks nice like this.  Your camera case should look like this now. 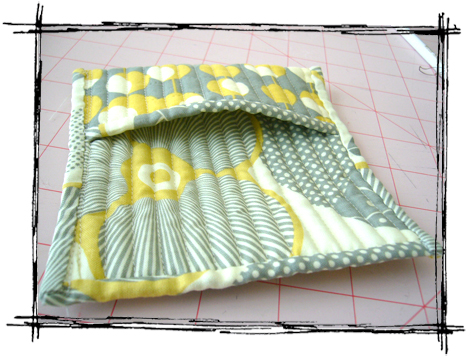 7) The only things left to do is to sew a button hole and attach a button! 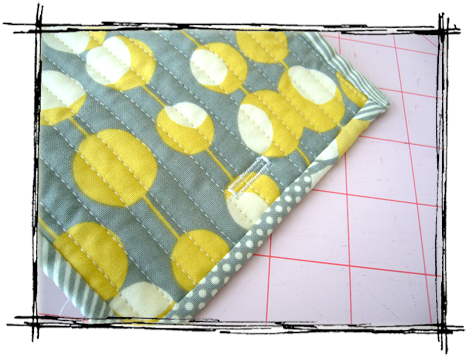 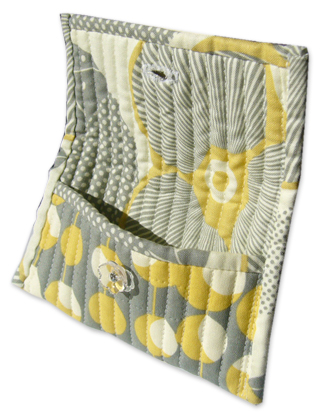 Done!! This is fairly easy to make and it does give a nicely soft protection for your camera. Pretty to carry with as well! If you make one, please let me know! I would LOVE to see it! Thanks for looking!!  |
Sunday, April 20, 2008
| Hello |
| Hi, here I finally created my blog in English which I've wanted to start for a long time. I've kept this Japanese blog, Ayumi's soap, updated since February 2005. In this blog, I mainly write about my life with all sorts of handmade experiences including soapmaking and sewing. I decided to start a new blog here, because there are many friends of mine who don't read Japanese but who are curious about what I was writing about, and I've wanted to expand potential readers by opening up a new blog in English and be a part of the community of crafting people all over the world. One of the two reasons it took me a while to do this was I was not sure if handling two blogs(this blog and my Japanese one) could be tough. And the other is that I was not sure if my English skills are sufficient to perfectly express whatever I have to say. But after all those concerns, I came to the conclusion that the only way to find out the answer is just to do it, start it, anyway. Well, I guess I shall introduce a little about myself, since this is my first posting. My name is Ayumi. I was born in Japan and grew up there but moved to America about 5 years ago. I met my perfectly sweet boyfriend in Seattle and we moved to California last year, because his job was here. We currently live in San Jose, California, where we get the perfect sunshine almost every day. I am a full-time student majoring in Accounting, always trying to find time to get crafty while most of the time is spent on studying. Well.. Too much blah, blah, blah. Let me move on to my most recent sewing project that I just finished yesterday. 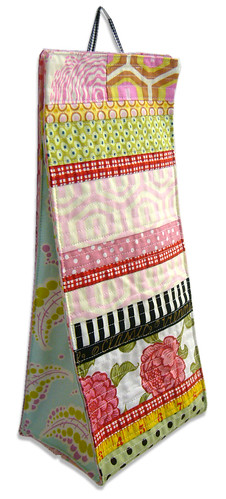 I made this plastic bag dispenser as a custom-order in my etsy shop. The pattern for this dispenser is in this book. I just love making this because it allows me to be totally creative in working on patchwork. I made eight of them total. The first one is here at my kitchen, brightening the atmosphere and always making me want to be there. Others including this eighth one are having fun at other kitchens: some in Japan and some in America. Whenever I make one of these, I use some of the vintage fabric that my totally sweet American mom (my boyfriend's mom), Kim, gave to me. She found an old curtain sample book at a yard sale in Spokane, Washington for $2 or some unbelievably low price. She took all the curtain samples from the book, washed them, and kept in a box for 5 years without discovering ways to use them. Each piece of the fabric is very small, but all of them are absolutely rare, beautiful, and vintage. She was super nice to share some with me. Every time I cut the precious vintage fabric, I feel like breaking my heart, but when I create something nice with it, I am totally satisfied. Those beautiful vintage fabric should not stay in my shelf, not being seen enough. It should be out there and be loved! This red rose fabric you see on the dispenser is one of them. I am in love with vintage fabric. Soon, I will post a tutorial on how to make a super simple camera case. Thanks so much for all of you who stopped by this blog!! I am really excited!! I promise it will be prettier!  |
Subscribe to:
Posts (Atom)


